# How I Set Up Claude Code as My Investment Research Analyst
**作者**: leopardracer
**日期**: 2026-05-25T16:32:33.000Z
**来源**: [https://x.com/leopardracer/status/2058949350315667829](https://x.com/leopardracer/status/2058949350315667829)
---
If you’re a finance person, you’ve probably looked at Claude Code once and looked away.
A black terminal. Commands that mean nothing. Something for engineers, not for someone who spends their day in spreadsheets and annual reports.
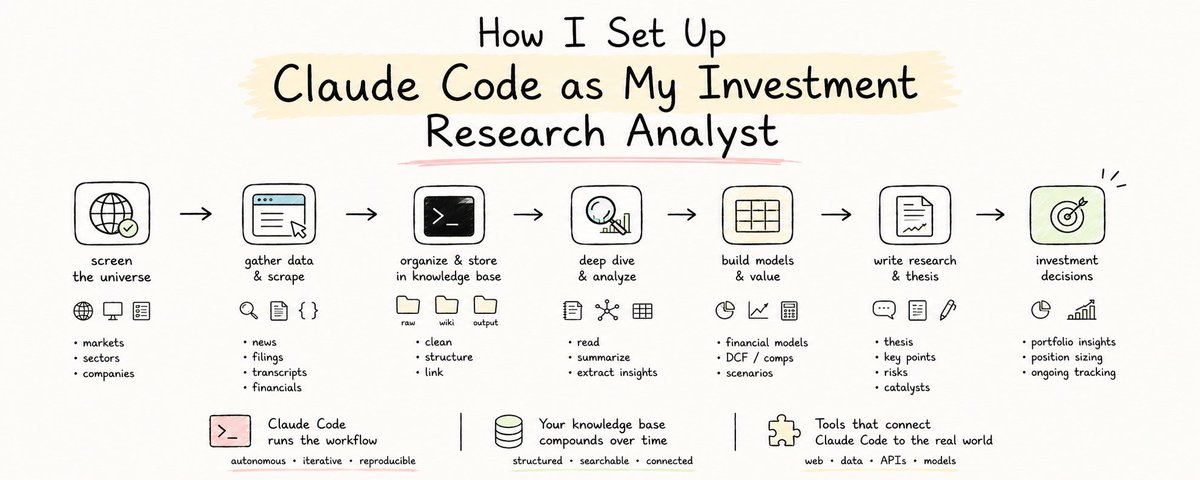
I’ve now been running my entire investment research workflow on Claude Code for sixty days. Screening, scraping, modeling, drafting reports, monitoring portfolios. The terminal stopped being intimidating somewhere around day three. By day ten, I had stopped opening Claude for research entirely.
Here’s what nobody told me, and what I want to tell you: Claude Code is for coding if you want to code. It’s for cooking if you want to cook. It’s for shopping if you want to shop. And if you’re really into finance, Claude Code is for finance too.
The “code” in the name is the most misleading part of the product.
This article is the setup guide I wish someone had handed me on day one. By the end of it, you’ll have Claude Code installed, a knowledge base that compounds every piece of research you do, and three tools bolted on that let Claude Code reach into the live web, drive a browser, and query your own notebooks.
If you’ve watched the video that goes with this, you’ll know the shape of it. The article goes deeper on the prompts, the file structure, and the rules that make the whole thing work.
Let’s start with the one idea that changed how I think about all of this.
## Claude vs. Claude Code: The One Thing Nobody Explains
Claude and ChatGPT are chatbots. You ask, they answer. You ask again, they answer again. Useful, but limited. The conversation is the product.
Claude Code is different. Claude Code is Claude with hands.
Think about what happens when you ask ChatGPT to help with an investment research workflow. You can ask it to screen for a few stocks. You can paste in financials and ask for a DCF. You can give it a draft and ask it to clean up the language. But each of those is one step, with you in the middle, copying and pasting between the chat and the rest of your work.
Now picture a real research workflow. You screen the universe. You shortlist on a few parameters. You apply your firm’s internal framework to the shortlist. You pick two names. You pull financial statements for both. You build a model. You stress test the model. You arrive at an intrinsic value. You draft an equity research report. A senior analyst reviews it. You publish.
A chatbot can help with one step at a time. Claude Code can run the whole chain.
You give it the end goal. It opens a browser if it needs to. It scrapes data if it needs to. It writes files. It reads files. It runs five things in parallel if the task allows. It asks you for input only when it actually needs you. The work happens while you do something else.
That’s what “hands” means. ChatGPT is a brain you talk to. Claude Code is a brain that runs your workflows.
There’s a line I keep coming back to. A smart, hardworking person does more by doing more. A wise person does more by eliminating more. Claude Code is the eliminator. Most of what we call “research work” is actually data gathering, formatting, copying, pasting, switching tabs. Claude Code takes that off your plate so the only thing left is the part that actually requires you.
That is the unlock. Everything else in this article is just how to set it up.
## Step One: Install Claude Code (The Easy Part)
If you'd rather watch this whole setup happen on screen, including the Playwright and Firecrawl install in the next section, I recorded a 16-minute walkthrough that covers everything end to end:
Go to the Claude Code page on Anthropic’s site. You’ll see two install commands, one for Mac and one for Windows. Copy the one for your machine.
- Official Claude Code setup docs: https://code.claude.com/docs/en/quickstart

If you’re on a Mac, open Terminal. If you’re on Windows, open PowerShell. Paste the command, hit enter, wait a minute. That’s the install.
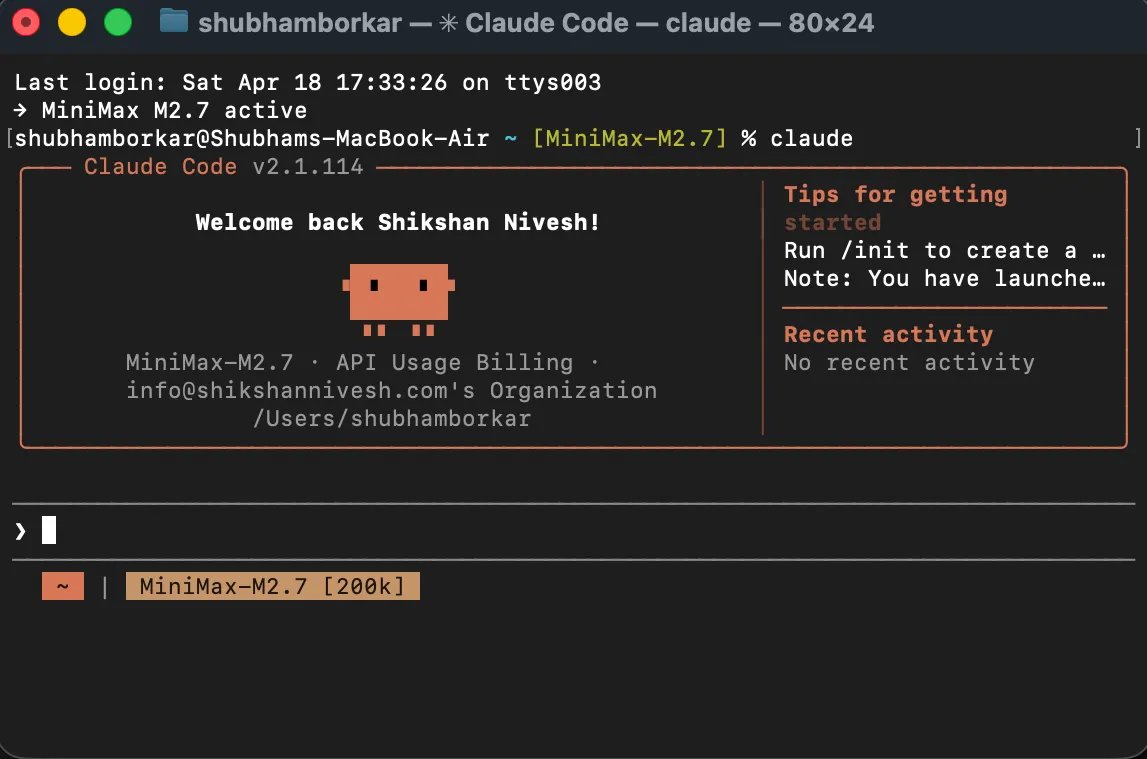
Now type claude and hit enter. The Claude Code prompt opens. You can start typing in plain English. Ask it anything. “Hi, I’m new here, how should I get started?” works fine. It will tell you.
That’s it. That’s the install.
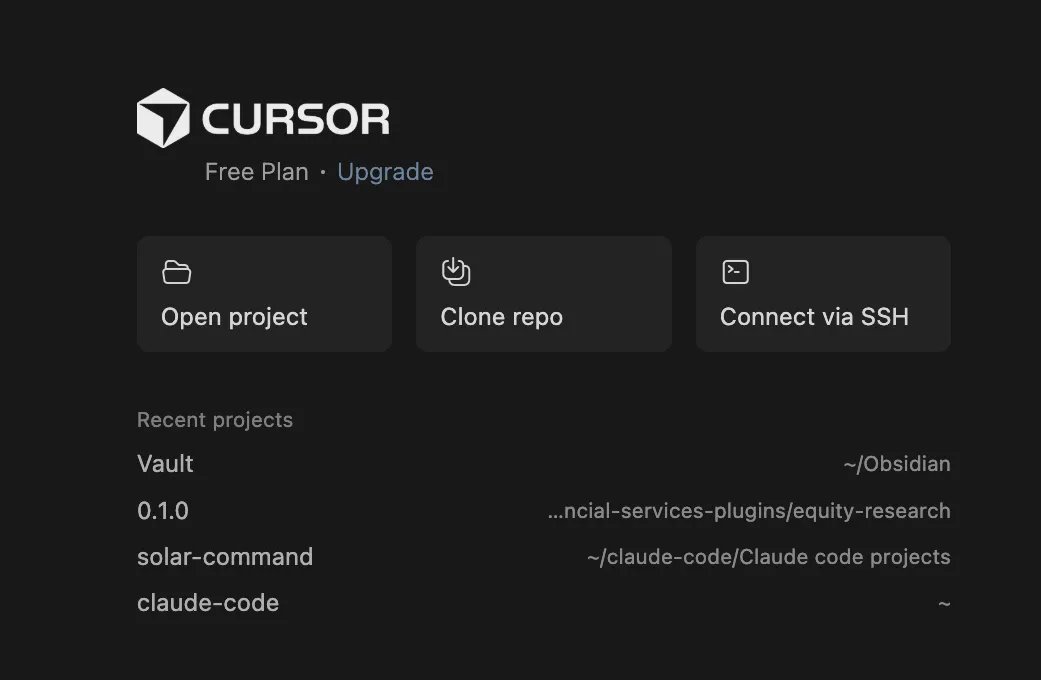
There’s one more thing to do before you go further: download Cursor.
- Official Cursor Page: https://cursor.com/home
Cursor isn’t an alternative to the terminal. It’s where the rest of this system lives. When you set up the Obsidian knowledge base in the next section, you’ll open your Obsidian vault as a folder inside Cursor. Your raw, wiki, and output folders sit in the sidebar. Claude Code runs in a panel next to them. You can watch files get created, edited, and indexed in real time, in the same window. Everything you build from here on out happens in this one place.
You can still use the plain terminal if you want to. I sometimes do, especially when I want to watch Claude Code grind through something complex. But Cursor is where the daily work actually happens, because it’s the only place where the knowledge base, the chat, and the tools are all visible at the same time.
Claude Code on its own is useful, but it’s not what makes the system in this article work. The install is two minutes. The setup that actually changes your research is what comes next.
Optional, only if you don’t want a Claude subscription
One quick note before we move on. Everything from here assumes you have a Claude subscription, Pro or Max. If you don't, and you don't want to buy one just to experiment, there's a working alternative called MiniMax M2 that slots into Claude Code as a replacement engine at roughly seven percent of the cost. Set it up, then come back and pick up from the next section. Everything that follows works identically.
## Step Two: Set Up Obsidian as Claude Code’s Memory
Claude Code on its own has no memory. Every session starts fresh. You can have a brilliant conversation with it on Monday, close the terminal, and on Tuesday it remembers nothing. For most coding tasks that’s fine. For research, it’s a problem. Research compounds. The note you took on a semiconductor company in March should be findable in November, alongside everything you’ve learned about the sector since.
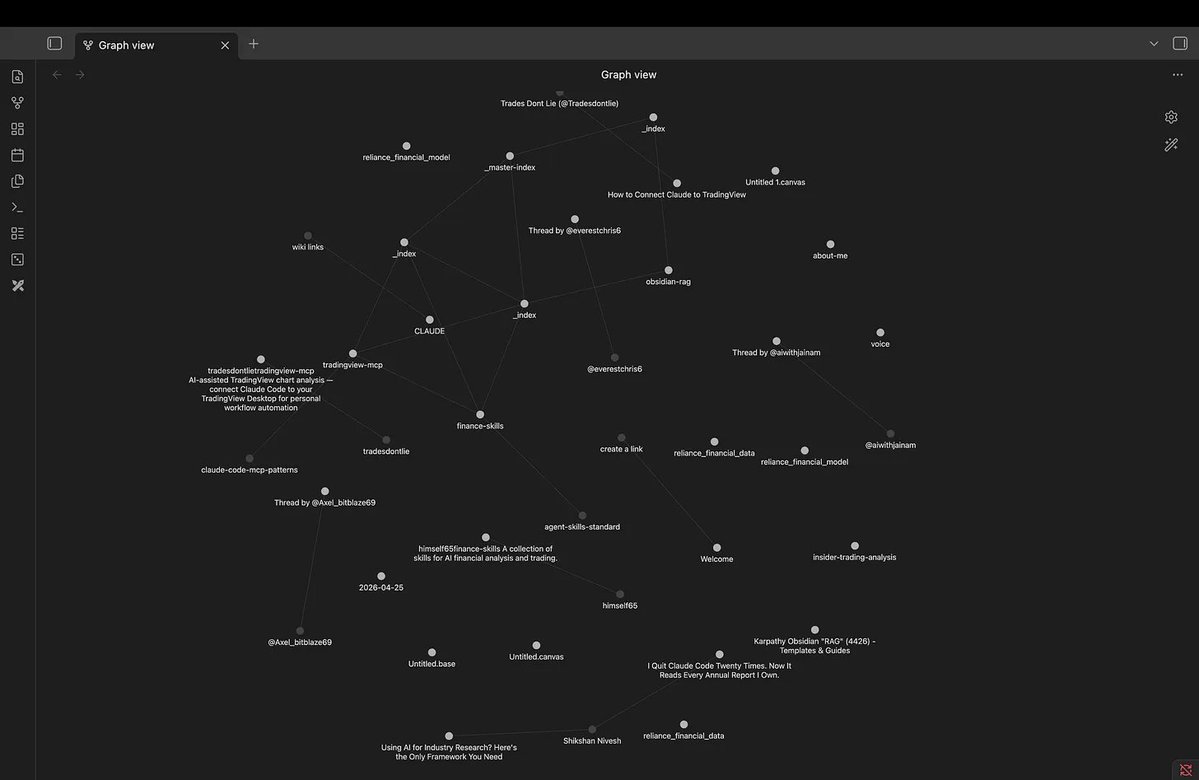
This is what Obsidian solves. Obsidian is a free app that turns a folder on your computer into a personal research library. Each note is a plain text file. You can link notes to each other, organize them into topic folders, and search across the whole library instantly. There’s no database, no cloud, no lock-in. Your research lives on your machine, in files you can read with any text editor.
The trick is that Claude Code can read and write to that same folder. Once you set it up correctly, Obsidian becomes Claude Code’s long-term memory. You hand Claude Code the role of librarian. It files what you collect, summarizes what you read, links related ideas across topics, and pulls from the library every time you ask a question. Over time the library gets smarter, because every answer Claude Code gives you gets filed back into it.
Here’s how to build it.
Install Obsidian and create your vault
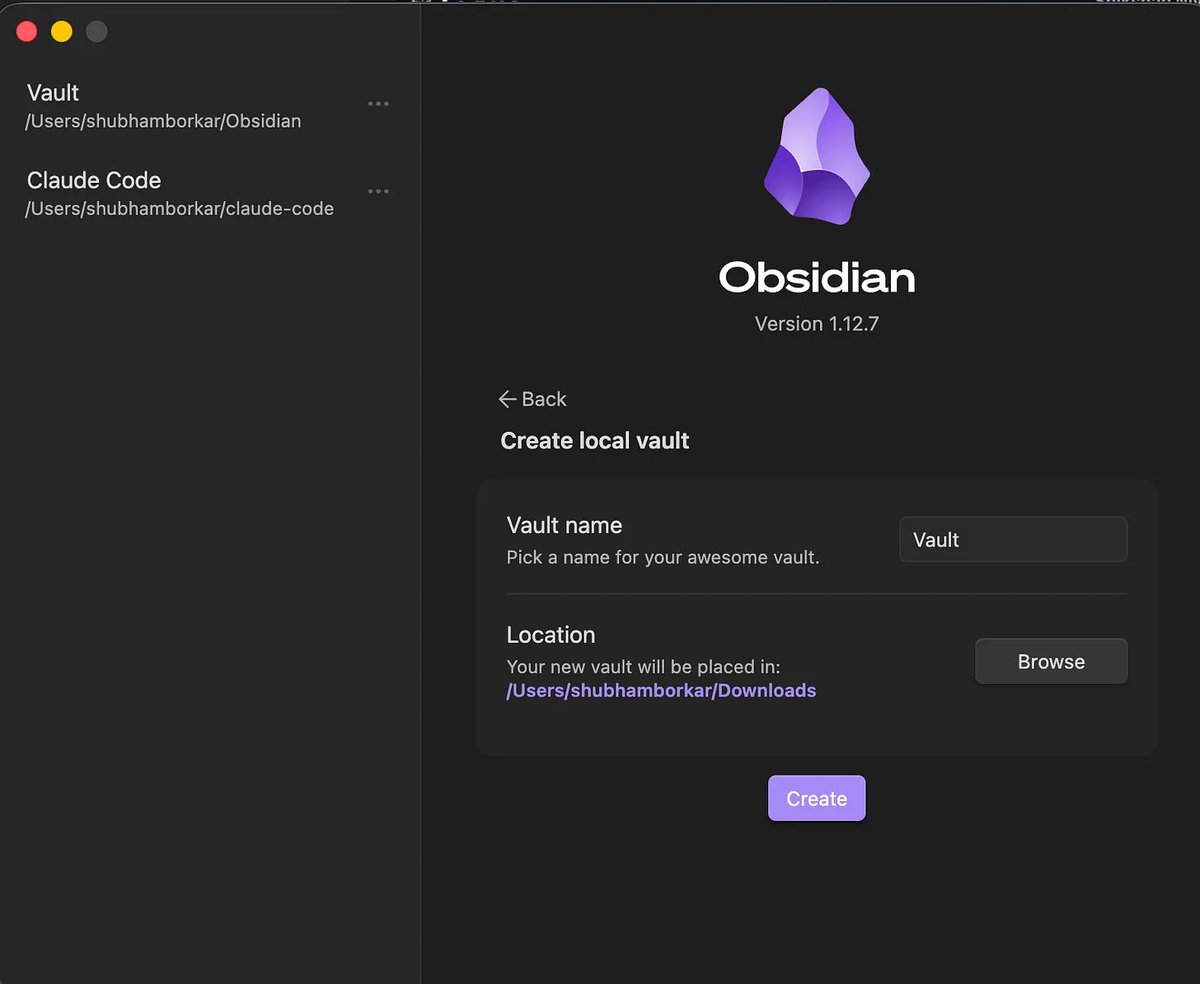
Download Obsidian from obsidian.md. It’s free for personal use, and works on Mac, Windows, and Linux.
Open Obsidian and click “Create new vault.” A vault is just a folder on your computer where Obsidian stores your notes. Name it whatever you want (mine is called Vault itself). Pick a location you’ll remember, somewhere in your Documents folder works fine. Obsidian will open the empty vault.
Now open that same vault folder inside Cursor. File → Open Folder → select your vault. You should see the folder name appear in Cursor’s sidebar, empty for now. This is where everything happens from here on.
## Create the folder structure
Open Claude Code inside Cursor (the sidebar panel, or the terminal, your choice). Paste this prompt exactly:
```
Create this folder structure for my knowledge base:
- raw/ — this is my inbox where I'll dump source material
- wiki/ — this is your domain, you'll write and maintain everything here
- Create a _master-index.md inside wiki/ with the heading "Knowledge Base Index"
and a note that says "Topics will be listed here as they are created."
- output/ — this is where query results and reports go
Just create the folders and that one file. Nothing else yet.
```
Claude Code will create three folders and one file. Open Obsidian and you’ll see them in the sidebar. That’s your skeleton.
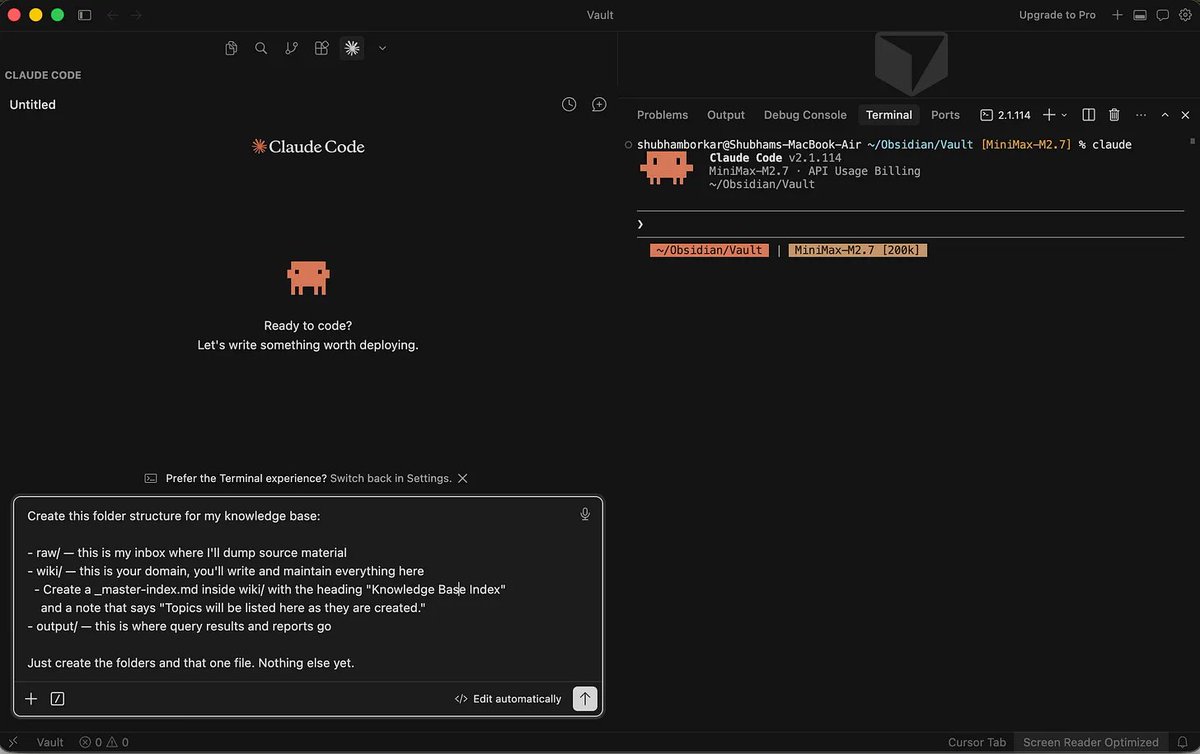
Three folders, three jobs. raw/ is your inbox where you dump anything you want the system to learn from: articles, transcripts, screenshots, notes. wiki/ is the librarian’s domain, where Claude Code writes structured summaries, organizes them into topic folders, and maintains a master index of everything. output/ is where finished work lands: research reports, query answers, analyses you want to keep separate from the library itself.
## The rulebook (CLAUDE.md)
This is the most important file in the whole system. CLAUDE.md is the rulebook Claude Code reads every time you open it inside this vault. You write the rules once, and Claude Code follows them forever. Without this file, Claude Code is just a clever assistant. With it, Claude Code is a disciplined librarian.
Create a file called CLAUDE.md in the root of your vault (not inside any of the three folders, but next to them). Paste this in:
```
This file tells you how to maintain this knowledge base across every session.
## Knowledge Base Rules
- This is an LLM-maintained knowledge base. You are the librarian.
- The wiki/ folder is YOUR domain - you write and maintain everything in it.
I rarely edit wiki files directly.
- raw/ is the inbox. When I dump files here, you process them into the wiki
during a "compile" step.
- wiki/_master-index.md is the entry point. It lists every topic folder with
a one-line description. Always keep this up to date.
- Each topic gets its own subfolder in wiki/ (e.g., wiki/ai-agents/) with its
own _index.md that lists all articles in that topic with brief descriptions.
- Always use [[wiki links]] to connect related concepts across topics.
- When compiling raw material:
1. Read the raw file
2. Decide which topic it belongs to (or create a new one)
3. Write a wiki article with key takeaways and relevant links
4. Update that topic's _index.md
5. Update wiki/_master-index.md
6. If a raw file spans multiple topics, create articles in both and cross-link
- Keep articles concise - bullet points over paragraphs.
- Include a ## Key Takeaways section in every wiki article.
- output/ is for query results and generated reports.
- When answering questions, read _master-index.md first to navigate, then
drill into the relevant topic _index.md, then read specific articles.
- When I ask you to "compile", process everything in raw/ that hasn't been
compiled yet into the wiki.
- When I ask you to "audit" or "lint", review the wiki for inconsistencies,
broken links, gaps, and suggest improvements.
```
Save the file. From now on, every session starts with Claude Code reading this rulebook.
## The daily input: Web Clipper
Web Clipper Page: obsidian.md/clipper
You need a way to get articles into your raw/ folder without copying and pasting. Install the Obsidian Web Clipper extension on your browser (Chrome, Brave, Edge, Firefox all supported).
Open the Web Clipper settings. Add your vault. Then go to Templates and edit the Default template:
- Vault: select your vault
- Note location: raw
- Note name: {{date|date:"YYYY-MM-DD"}}-{{title|safe_name}}
Now any article you read on the web becomes a clean markdown file in your inbox with one click. An earnings transcript, an FT piece, a 10-K excerpt, a Substack post, all get clipped the same way.
One optional add-on: install the Local Images Plus plugin inside Obsidian (Settings → Community Plugins → Browse → search “Local Images Plus”). When you open a clipped note, this plugin downloads every image from the article into your vault, so your library stays intact even if the original page goes down.
## The daily workflow: four verbs
Once everything is set up, the workflow is four verbs.
Clip. You see something worth keeping. One click in your browser, it lands in raw/. You don’t decide where it goes, you don’t write a summary, you just clip it.
Compile. Once a week, or whenever your inbox feels full, open Claude Code and type:
```
Compile everything in raw/ into the wiki. For each file:
1. Read it and identify the core topic
2. Create or find the right topic folder in wiki/
3. Write a wiki article with a summary, key takeaways, and [[wiki links]]
to any related concepts
4. Update the topic's _index.md
5. Update wiki/_master-index.md
Cross-link between topics wherever relevant.
```
Claude Code reads each clipped article, decides which topic it belongs to, writes a structured summary note, files it in the right folder, and updates the indexes. By the time you finish your coffee, your inbox is empty and your library is bigger.
Query. Ask the library questions. Simple ones: “What were the key findings from the Bain semiconductor report I clipped last month?” Cross-referencing ones: “How does the slowdown in Chinese auto exports relate to what I’ve been reading about commodity demand?” Synthesis ones that file the answer back into the library: “Based on everything in the wiki, what are the main bull and bear cases on Indian specialty chemicals? Save your answer as a new wiki article and link it to the sources you referenced.”
That last query is the move that makes the system compound. Every question you ask becomes a new note. Every note links to its sources. The library grows smarter every time you use it.
Audit. Once a month, type: “Audit the wiki. Look for inconsistencies, broken links, missing cross-references, and gaps in coverage. Don’t make changes yet, just give me a report.” Claude Code walks the whole library and tells you where it’s getting fuzzy. You decide what to fix.
That’s the system. Inbox, librarian, library, output. Four folders, one rulebook, four verbs.
The reason this matters more than it looks: the system is the discipline. Anyone can install Obsidian and Claude Code. The reason your research compounds instead of leaking is that the rulebook forces consistency. Every clip gets filed the same way. Every summary follows the same format. Every query has access to everything you’ve ever read. After sixty days of running this, I can ask Claude Code “what have I learned about position sizing this quarter” and get a real answer in under a minute, drawn from articles I’d half-forgotten clipping.
Now we add the parts that let Claude Code reach beyond your library, into the live web.
## Step Three: Give Claude Code Hands on the Web (Playwright + Firecrawl)
The knowledge base you just built is powerful, but it’s also closed. It only knows what you’ve fed into it. For real research work, you need Claude Code to reach out into the live web: pull a balance sheet from a screener, scrape an investor relations page, search for the latest filings on a company you’re tracking. That’s what these next two tools do.
Playwright lets Claude Code drive a real browser. Firecrawl lets Claude Code search and scrape the web at scale. Both are free and open source. Both install in about two minutes. Together they’re the difference between a librarian who only reads what you bring home and a librarian who can also walk to the library across town and bring back what you need.
## Playwright: the browser
Playwright is a browser automation tool from Microsoft. Once it’s installed, Claude Code can open a browser, navigate to any page, click buttons, fill forms, log into accounts, and read what’s on the screen, all without you touching the mouse.
For finance work, this matters in places where the data lives behind interaction. A screener that requires you to set ten filters before showing results. An investor relations page that hides quarterly numbers behind a dropdown. A regulator’s portal that needs you to accept a disclaimer before downloading a filing. Anywhere a regular scraper would fail because the page expects a human, Playwright lets Claude Code be that human.
To install it, open Claude Code in your vault and paste:
```
I want to install Playwright CLI from Microsoft so you can drive a browser
on my behalf. The repository is at https://github.com/microsoft/playwright-cli.
Walk me through the installation step by step for my [Mac / Windows] machine,
beginner-friendly, and run the commands you need to run.
```
Claude Code will install it, walk you through any prompts, and confirm when it’s ready. Test it by asking something simple: “Open a browser, go to screener.in, and tell me what’s on the homepage.” If Playwright is installed correctly, a browser window opens, navigates to the page, and Claude Code reports back what it sees.
## Firecrawl: the web scraper
Firecrawl does something different. Where Playwright is a hands-on browser, Firecrawl is a fast, programmatic way to pull clean text from any web page or run a web search and pull text from the top results. It converts whatever it finds into clean markdown files that Claude Code can read directly.
The use case finance people will recognize immediately: you want to pull insider trading data from Finviz for the last two weeks. You want to scrape an annual report from a company’s IR page. You want to search for “latest news on Indian specialty chemicals” and pull the top ten articles into your knowledge base. Firecrawl does all three with a single command each.
To install:
```
I want to install Firecrawl CLI so you can search and scrape the web on my behalf.
The official docs are at https://docs.firecrawl.dev/sdks/cli.
Walk me through the installation step by step for my [Mac / Windows] machine,
beginner-friendly, and give me every command I need to run.
```
Once installed, Firecrawl becomes a tool Claude Code can call directly from the terminal. You don't have to invoke it manually each time. When a task requires the live web, Claude Code recognizes it has Firecrawl available and uses it automatically.
## What this looks like in practice
Here’s a real prompt I ran last week. The setup: I wanted to deploy capital across five names and only had two on my shortlist. I needed three more.
```
I'm screening for names to deploy capital. Go to finviz.com, pull insider
trading data for the last two weeks of US-listed companies. Analyze the
data for strong buy signals. Give me a top 10 watchlist with reasoning for each name.
Also flag red flags and names to avoid.
```
Claude Code asked permission to use Firecrawl. I said yes. It went to Finviz, pulled the data, parsed it, ran the buy-signal logic, cross-checked fundamentals, and came back with a ranked list of ten names. Each one had a thesis, a list of insider purchases (with who bought, when, and how much), key risks, and a summary scorecard. Three minutes start to finish.
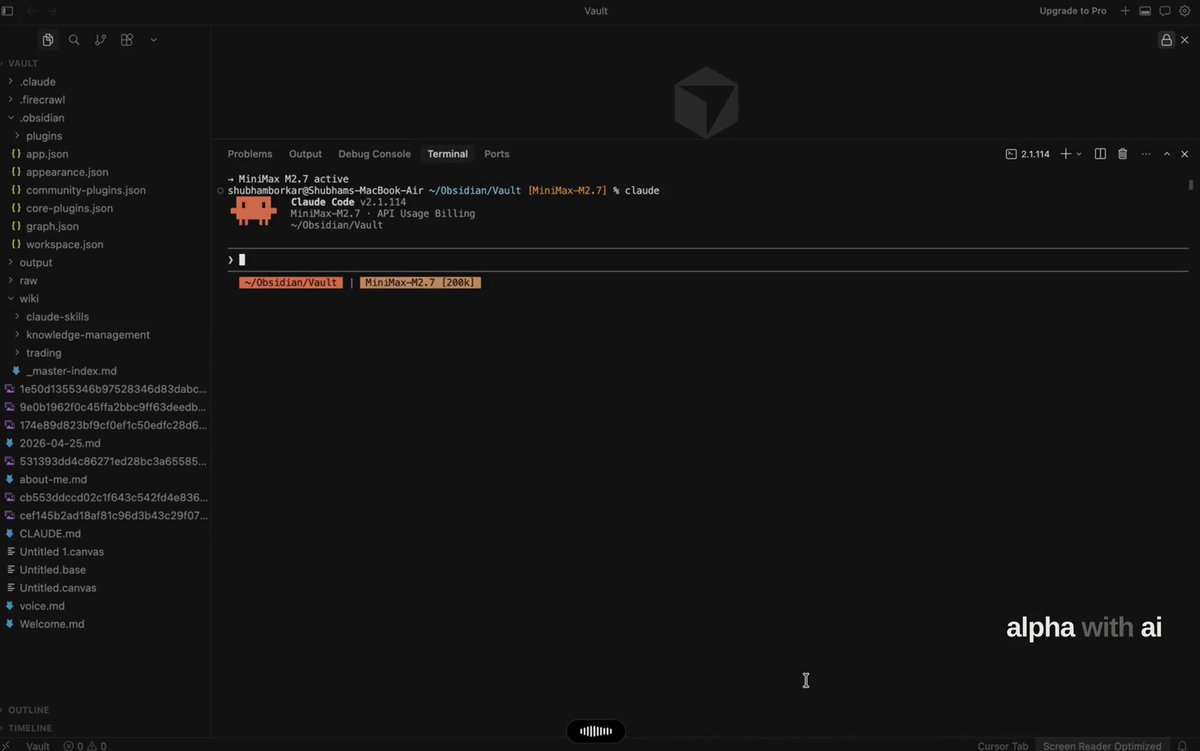
If I’d done that manually, it would have been 90 minutes minimum, and I’d have introduced errors copying data between Finviz and Excel. Claude Code did it without leaving the terminal.
## One thing about permissions
Every time Claude Code wants to use a tool like Firecrawl or Playwright, or modify a file, or run a command, it asks for permission. By default, this means a yes/no prompt every few steps. Useful when you’re learning. Annoying once you trust the system.
There’s a flag called --dangerously-skip-permissions that turns the prompts off entirely. Claude Code can then run any tool, modify any file in your vault, and execute commands without checking with you each time. The name sounds alarming, and it should. You’re handing Claude Code full access to your working directory.
I’ve been running with this flag on for sixty days. Nothing has broken. No file deleted by accident, no command run that shouldn’t have been run, no security issue. What changed is that I stopped sitting in front of the terminal waiting to click “yes.” I started giving Claude Code a task and walking away. By the time I came back with coffee, the task was done.
The reason this works is the rulebook. CLAUDE.md tells Claude Code exactly what its job is and what the boundaries are. Combined with the fact that Claude Code only has access to the vault folder you opened, not your whole machine, the risk is much smaller than the name of the flag suggests. I’d recommend running with permissions on for the first week so you can see what Claude Code is doing. Once you trust the pattern, turn permissions off and let it work.
That’s a personal call. Some readers will keep permissions on forever and that’s fine. The system works either way.
## What 60 Days Has Taught Me
The setup above takes about an hour. The system it creates is something I’m still learning to use sixty days in.
A few things have surprised me.
The first is how quickly the terminal stopped feeling like a coding tool. By the end of the first week, I was typing into Claude Code the same way I type into ChatGPT. Plain English, no commands, no syntax. The intimidation factor people warn about is real for the first day, and gone by the third. If you’re a finance person reading this and hesitating, you’re hesitating about a problem that won’t survive the first session.
The second is what happens when you stop being a chatbot user and start being a workflow operator. The shift is subtle but everything downstream changes. You stop asking Claude Code to “help you” with one task and start handing it the whole task. Screen these names, run them through this framework, pull financials for the survivors, build models, draft a one-pager on each. You give it the end goal and walk away. The work happens in the background. You come back to a folder of finished output.
The third is how much research used to leak. Before this system, I had research scattered across Notion, Apple Notes, browser bookmarks, downloaded PDFs in five different folders, and a Substack drafts folder I rarely opened. I’d rediscover the same insight twice, sometimes three times. The Obsidian knowledge base ended that. Everything I read now lands in one place, gets filed by Claude Code into the right topic, and gets pulled back when I ask a related question six weeks later. Nothing leaks. Information compounds.
One more tool worth knowing about: NotebookLM. It’s Google’s hosted research tool, and it solves a different problem than Obsidian. Obsidian is your library. NotebookLM is a focused workspace for one specific research target: a single company, a single sector, a batch of filings. You upload the sources, and NotebookLM gives you grounded, cited answers across just those documents. There’s a Python wrapper that lets you query a notebook directly from inside Claude Code, which means you can build a workflow where Claude Code pulls from your Obsidian library and a focused NotebookLM source set in the same prompt.
## What’s coming next
This article is part of a series. Now that the setup is done, the next pieces will go deep into specific finance workflows: a full equity research workflow that runs end to end inside Claude Code, a wealth management workflow for prioritizing client calls after a market event, a monthly accounting audit workflow, and a portfolio monitoring system that runs on a virtual server and pings you when something needs attention. Each of these will use the system you just built.
If you want the rest of the series as it comes out, you’re already in the right place by reading this.
Claude Code is for coding if you want to code. It’s for cooking if you want to cook. It’s for shopping if you want to shop. And if you’re really into finance, it’s the most powerful research tool you can have on your machine right now. The hour you spend setting this up is the hour your research stops leaking and starts compounding.
That’s the whole thing.
If this was useful - follow my telegram channel:
https://t.me/+ygATQAt9sUM1N2U6
## 相关链接
- [leopardracer](https://x.com/leopardracer)
- [@leopardracer](https://x.com/leopardracer)
- [9.2K](https://x.com/leopardracer/status/2058949350315667829/analytics)
- [https://code.claude.com/docs/en/quickstart](https://code.claude.com/docs/en/quickstart)
- [https://cursor.com/home](https://cursor.com/home)
- [obsidian.md](https://obsidian.md/)
- [obsidian.md/clipper](https://obsidian.md/clipper)
- [screener.in](https://screener.in/)
- [https://t.me/+ygATQAt9sUM1N2U6](https://t.me/+ygATQAt9sUM1N2U6)
- [Upgrade to Premium](https://x.com/i/premium_sign_up)
- [12:32 AM · May 26, 2026](https://x.com/leopardracer/status/2058949350315667829)
- [9,216 Views](https://x.com/leopardracer/status/2058949350315667829/analytics)
- [View quotes](https://x.com/leopardracer/status/2058949350315667829/quotes)
---
*导出时间: 2026/5/26 09:27:49*
---
## 中文翻译
# 我如何将 Claude Code 打造成我的投资研究分析师
**作者**: leopardracer
**日期**: 2026-05-25T16:32:33.000Z
**来源**: [https://x.com/leopardracer/status/2058949350315667829](https://x.com/leopardracer/status/2058949350315667829)
---

如果你是金融从业者,你可能看过一眼 Claude Code 然后就匆匆移开了视线。
一个黑色的终端。一堆不知所云的命令。这是工程师的玩具,而不是属于那些整天与电子表格和年报打交道的人的工具。
现在,我已经在 Claude Code 上运行我的整个投资研究流程六十天了。筛选、抓取、建模、起草报告、监控投资组合。大约到了第三天,这个终端就不再让我望而生畏了。到了第十天,我已经完全停止为了研究而打开普通的 Claude 界面。
有些事没人告诉过我,而我想告诉你:如果你想写代码,Claude Code 就是用来写代码的。如果你想做饭,它就是用来做饭的。如果你想购物,它就是用来购物的。如果你真的热衷于金融,那么 Claude Code 也是为金融而生的。
名字里的“Code(代码)”是这款产品最具误导性的部分。
这篇文章是我希望有人在我第一天就递给我的设置指南。读完之后,你将安装好 Claude Code,拥有一个能把你所做的每一项研究都复利化的知识库,以及三个附加工具,让 Claude Code 能够触达实时网络、驱动浏览器以及查询你自己的笔记本。
如果你看过配套的视频,你就会对整体架构有所了解。这篇文章将深入探讨提示词、文件结构以及让整个系统运转的规则。
让我们先从改变我对这一切看法的那个核心概念开始。
## Claude vs. Claude Code:没人解释过的关键点
Claude 和 ChatGPT 是聊天机器人。你问,它答。你再问,它再答。虽然有用,但很有限。对话本身即是产品。
Claude Code 则不同。Claude Code 是长了双手的 Claude。
想一想当你让 ChatGPT 协助进行投资研究流程时会发生什么。你可以让它筛选几只股票。你可以粘贴财务数据并要求进行 DCF 估值。你可以给它一份草稿并要求润色语言。但这些都只是单一步骤,你需要夹在中间,在聊天界面和其他工作之间复制粘贴。
现在想象一个真实的研究工作流。你筛选全市场股票。你根据几个参数进行初筛。你应用公司的内部框架到初筛名单中。你选出两个标的。你提取两者的财务报表。你建立模型。你对模型进行压力测试。你得出了内在价值。你起草一份权益研究报告。高级分析师进行审核。你发布。
聊天机器人一次只能帮你完成一个步骤。Claude Code 则可以运行整个链条。
你给它最终目标。如果需要,它会打开浏览器。如果需要,它会抓取数据。它写入文件。它读取文件。如果任务允许,它可以并行运行五件事。只有在真的需要你时,它才会请求你的输入。当你在做其他事情时,工作就在同步进行。
这就是“双手”的含义。ChatGPT 是一个你与之交谈的大脑。Claude Code 是一个为你运行工作流的大脑。
有一句话我一直在回味。聪明勤劳的人通过做更多事来做成更多事。智慧的人通过消除更多事来做成更多事。Claude Code 就是那个消除者。我们所谓的“研究工作”大部分实际上是数据收集、格式化、复制、粘贴和切换标签页。Claude Code 把这些从你的盘子里拿走,剩下的只有真正需要你参与的部分。
这就是解锁方式。本文的其余部分只是关于如何设置它。
## 第一步:安装 Claude Code(简单的部分)
如果你宁愿看着整个安装过程在屏幕上发生,包括下一节的 Playwright 和 Firecrawl 安装,我录制了一个 16 分钟的演示视频,涵盖了从头到尾的一切:
前往 Anthropic 网站上的 Claude Code 页面。你会看到两条安装命令,一条用于 Mac,一条用于 Windows。复制适用于你机器的那条。
- 官方 Claude Code 设置文档:https://code.claude.com/docs/en/quickstart

如果你使用 Mac,请打开终端。如果你使用 Windows,请打开 PowerShell。粘贴命令,按回车,等待一分钟。安装就完成了。
现在输入 `claude` 并按回车。Claude Code 的提示符就会打开。你可以开始用简单的英语输入。问它任何问题。比如“嗨,我是新来的,该怎么开始?”就很好。它会告诉你的。
就是这样。安装完成了。

在进行下一步之前还有一件事要做:下载 Cursor。
- 官方 Cursor 页面:https://cursor.com/home
Cursor 不是终端的替代品。它是这个系统其余部分的栖息地。当你设置下一节的 Obsidian 知识库时,你会把 Obsidian 仓库(vault)作为文件夹在 Cursor 中打开。你的 raw、wiki 和 output 文件夹位于侧边栏中。Claude Code 运行在旁边的面板里。你可以在同一个窗口中实时看到文件被创建、编辑和索引。从这里开始构建的一切都发生在这一一个地方。
如果你愿意,仍然可以使用纯终端。我有时会这样做,特别是当我想要观察 Claude Code 研磨处理某些复杂任务时。但 Cursor 是日常工作的实际发生地,因为它是唯一一个知识库、聊天和工具同时可见的地方。
Claude Code 本身很有用,但这并不是让本文中的系统运作起来的原因。安装只需两分钟。真正改变你研究工作的设置是接下来的部分。
可选(仅当你不想订阅 Claude 时)
在继续之前有一个快速提示。接下来的内容假设你拥有 Claude 订阅,Pro 或 Max 版。如果你没有,并且不想为了实验而专门购买,有一个可行的替代方案叫做 MiniMax M2,它作为替代引擎嵌入 Claude Code,成本大约只有原来的 7%。先设置它,然后回到这里从下一节继续。之后的一切操作都是相同的。
## 第二步:设置 Obsidian 作为 Claude Code 的记忆
Claude Code 本身没有记忆。每次会话都是全新的。你周一可以和它进行一场精彩的对话,关闭终端,到了周二它什么都不记得了。对于大多数编码任务来说这没问题。但对于研究来说,这是个问题。研究是复利的。你在三月份关于一家半导体公司做的笔记,应该在十一月也能被找到,与你在该领域此后学到的所有知识并列。
这就是 Obsidian 解决的问题。Obsidian 是一个免费应用程序,将你电脑上的一个文件夹变成个人研究图书馆。每个笔记都是纯文本文件。你可以将笔记相互链接,将它们组织到主题文件夹中,并跨整个库即时搜索。没有数据库,没有云端,没有锁定。你的研究存在于你的机器上,存在于你可以用任何文本编辑器阅读的文件中。
诀窍在于 Claude Code 可以读写同一个文件夹。一旦设置正确,Obsidian 就变成了 Claude Code 的长期记忆。你把图书管理员的角色交给 Claude Code。它归档你收集的内容,总结你阅读的内容,跨主题链接相关想法,并在每次你提问时从库中提取信息。随着时间的推移,这个库会变得更智能,因为 Claude Code 给你的每一个答案都会被归档回其中。

以下是构建方法。
安装 Obsidian 并创建你的仓库
从 obsidian.md 下载 Obsidian。它供个人使用免费,适用于 Mac、Windows 和 Linux。
打开 Obsidian 并点击“创建新仓库”。仓库只是 Obsidian 在你电脑上存储笔记的一个文件夹。随你喜欢命名(我的就叫 Vault)。选一个你能记住的位置,放在文档文件夹里就很好。Obsidian 将打开空仓库。

现在在 Cursor 中打开同一个仓库文件夹。文件 → 打开文件夹 → 选择你的仓库。你应该会看到文件夹名称出现在 Cursor 的侧边栏中,目前是空的。从现在开始,一切都是在这里发生的。

## 创建文件夹结构
在 Cursor 中打开 Claude Code(侧边栏面板或终端,随你选)。完全照搬粘贴这条提示词:
```
为我的知识库创建这个文件夹结构:
- raw/ — 这是我的收件箱,我会把原始材料扔在这里
- wiki/ — 这是你的领域,你将在这里编写和维护所有内容
- 在 wiki/ 内创建一个 _master-index.md,标题为“知识库索引”
并注明“主题将在创建时在此列出”。
- output/ — 这是查询结果和报告的去处
只需创建文件夹和那一个文件。暂时不要做其他事情。
```
Claude Code 将创建三个文件夹和一个文件。打开 Obsidian,你会在侧边栏看到它们。这就是你的骨架。

三个文件夹,三种职责。raw/ 是你的收件箱,你把任何想系统学习的东西都扔在这里:文章、文字记录、截图、笔记。wiki/ 是图书管理员的领域,Claude Code 在这里编写结构化的摘要,将它们组织到主题文件夹中,并维护所有内容的主索引。output/ 是完成的工作落地的地方:研究报告、查询答案、你想与库本身分开保存的分析。
## 规则手册(CLAUDE.md)
这是整个系统中最重要的文件。CLAUDE.md 是 Claude Code 每次在这个仓库中打开时都会阅读的规则手册。你写一次规则,Claude Code 就永远遵守。没有这个文件,Claude Code 只是一个聪明的助手。有了它,Claude Code 就是一个纪律严明的图书管理员。
在你的仓库根目录创建一个名为 CLAUDE.md 的文件(不在三个文件夹中的任何一个里面,而是与它们并列)。把这个粘贴进去:
```
这个文件告诉你如何在每次会话中维护这个知识库。
## 知识库规则
- 这是一个由 LLM 维护的知识库。你是图书管理员。
- wiki/ 文件夹是你的领域——你在这里编写和维护所有内容。
我很少直接编辑 wiki 文件。
- raw/ 是收件箱。当我把文件扔在这里时,你会在“编译”步骤中
将其处理到 wiki 中。
- wiki/_master-index.md 是入口点。它列出每个主题文件夹
并附上一行描述。始终保持最新。
- 每个主题在 wiki/ 中都有自己的子文件夹(例如 wiki/ai-agents/),
并有自己的 _index.md,列出该主题中的所有文章及简要描述。
- 始终使用 [[wiki 链接]] 连接跨主题的相关概念。
- 编译原始材料时:
1. 读取原始文件
2. 决定它属于哪个主题(或创建一个新主题)
3. 编写一篇包含关键要点和相关链接的 wiki 文章
4. 更新该主题的 _index.md
5. 更新 wiki/_master-index.md
6. 如果原始文件跨越多个主题,则在两者中创建文章并交叉链接
- 保持文章简洁——用要点代替段落。
- 在每篇 wiki 文章中包含一个 ## 关键要点 部分。
- output/ 用于查询结果和生成的报告。
- 回答问题时,先读取 _master-index.md 以进行导航,然后
深入到相关主题的 _index.md,再阅读具体文章。
- 当我要求你“编译”时,将 raw/ 中尚未编译的所有内容
处理到 wiki 中。
- 当我要求你“审计”或“检查”时,审查 wiki 的不一致性、
损坏的链接、空白处,并提出改进建议。
```
保存文件。从现在起,每次会话都从 Claude Code 阅读这本规则手册开始。
## 日常输入:Web Clipper(网页剪辑器)
Web Clipper 页面:obsidian.md/clipper
你需要一种方法将文章放入你的 raw/ 文件夹而无需复制和粘贴。在你的浏览器上安装 Obsidian Web Clipper 扩展程序(支持 Chrome、Brave、Edge、Firefox)。
打开 Web Clipper 设置。添加你的仓库。然后转到模板并编辑默认模板:
- 仓库:选择你的仓库
- 笔记位置:raw
- 笔记名称:{{date|date:"YYYY-MM-DD"}}-{{title|safe_name}}
现在你在网上阅读的任何文章都可以通过一键点击变成收件箱中整洁的 markdown 文件。财报电话会记录、FT(金融时报)的文章、10-K 摘录、Substack 帖子,都可以用同样的方式剪辑。
一个可选的附加组件:在 Obsidian 内安装 Local Images Plus 插件(设置 → 社区插件 → 浏览 → 搜索“Local Images Plus”)。当你打开剪辑的笔记时,这个插件会将文章中的每张图片下载到你的仓库中,这样即使原始页面失效,你的库也能保持完整。
## 日常工作流:四个动词
一旦一切设置完成,工作流就是四个动词。
剪辑。你看到了值得保留的内容。在浏览器中点击一下,它就会落入 raw/。你不需要决定它去哪里,不需要写摘要,只需剪辑。
编译。每周一次,或者每当收件箱感觉满了的时候,打开 Claude Code 并输入:
```
将 raw/ 中的所有内容编译到 wiki 中。对于每个文件:
1. 阅读并识别核心主题
2. 在 wiki/ 中创建或找到正确的主题文件夹
3. 编写一篇包含摘要、关键要点和 [[wiki 链接]]
指向任何相关概念的 wiki 文章
4. 更新该主题的 _index.md
5. 更新 wiki/_master-index.md
在任何相关的地方进行跨主题交叉链接。
```
Claude Code 会阅读每篇剪辑的文章,决定它属于哪个主题,编写结构化的摘要笔记,将其归档到正确的文件夹中,并更新索引。等你喝完咖啡,你的收件箱就空了,而你的库又变大了。
查询。向库提问。简单的问题:“我上个月剪辑的贝恩半导体报告的主要发现是什么?”交叉引用的问题:“中国汽车出口的放缓与我读到的关于大宗商品需求的资料有什么关系?”综合类问题会将答案归档回库中:“根据 wiki 中的所有内容,关于印度特种化学品的主要多头和空头论点是什么?将你的答案保存为一篇新的 wiki 文章,并将其链接到你引用的来源。”
最后一个查询是让系统产生复利的关键举措。你问的每个问题都变成一条新笔记。每条笔记都链接到其来源。每次使用库,它都会变得更聪明。
审计。每月一次,输入:“审计 wiki。查找不一致之处、损坏的链接、缺失的交叉引用和覆盖范围的空白。暂不要做更改,只给我一份报告。”Claude Code 会遍历整个库并告诉你哪里变得模糊了。你来决定修复什么。
这就是系统。收件箱、图书管理员、库、输出。三个文件夹,一本规则手册,四个动词。
这之所以比看起来更重要,原因在于:系统即纪律。任何人都可以安装 Obsidian 和 Claude Code。你的研究之所以能复利而不是流失,是因为规则手册强制了一致性。每次剪辑都以同样的方式归档。每篇摘要都遵循相同的格式。每次查询都能访问你曾经读过的所有内容。在运行这个系统六十天后,我可以问 Claude Code“关于本季度的仓位规模我学到了什么”,并在一分钟内得到一个真实的答案,这些答案提取自我已经淡忘的、曾剪辑过的文章。
现在我们添加让 Claude Code 超越你的库、触达实时网络的部分。
## 第三步:赋予 Claude Code 触达网络的能力(Playwright + Firecrawl)
你刚刚建立的知识库很强大,但它也是封闭的。它只知道你输入的内容。对于真正的研究工作,你需要 Claude Code 触达实时网络:从筛选器中提取资产负债表,抓取投资者关系页面,搜索你正在跟踪的公司的最新文件。这就是接下来的两个工具的作用。
Playwright 让 Claude Code 能够驱动真实的浏览器。Firecrawl 让 Clau