# I Rebuilt My Entire Claude Code Setup Inside Pi. Here's How
**作者**: Tom
**日期**: 2026-07-21T13:29:30.000Z
**来源**: [https://x.com/tomcrawshaw01/status/2079559394942206156](https://x.com/tomcrawshaw01/status/2079559394942206156)
---
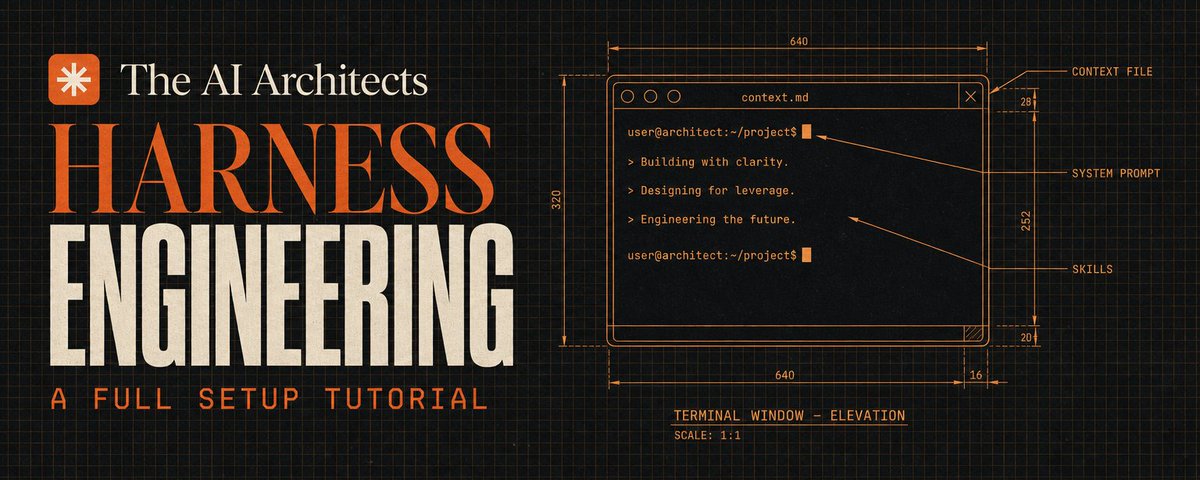
A full tutorial on harness engineering: what it is, why it matters more than the model, and exactly how to set up your own harness in Pi.
## What is harness engineering?
Every AI agent is two parts. The model, which is the raw brain you rent from Anthropic, OpenAI, or Moonshot. And the harness, which is everything you build around it. Your instructions, your tools, your memory, your rules.
The shorthand the field has settled on:
Agent = Model + Harness
Harness engineering is the craft of configuring that second part on purpose, so a model's raw capability turns into reliable behaviour you can trust with real work. Same model, better harness, dramatically better output. That gap is where almost all of your leverage lives.
And if you use Claude Code, you've already been doing it. Your CLAUDE.md, your skills folder, your custom commands. That is a harness. You've been engineering it by instinct.
The reason this tutorial exists: for about a year my harness only ran on one model.
When I wanted to put Kimi K3 through real work, switching felt like tearing everything down. So I rebuilt the whole setup inside a coding agent called Pi, where the harness is just plain files you can see and edit.
This is the full setup, commands and all.
## Step one: install Pi and log in
```
npm install -g --ignore-scripts @earendil-works/pi-coding-agent
cd /path/to/your-project
pi
```
Then inside Pi:
/login
That one command covers almost everything you'll need. You can log in with your existing Claude Pro/Max subscription, a ChatGPT/Codex plan, GitHub Copilot, or OpenRouter, which is what I'm using to run Kimi K3.
Log in once and every model from that provider shows up in your list.
From then on, switching models is:
/model
That's the whole job. Ctrl+L does the same thing.
(If you ever want something exotic that isn't built in, like a local Ollama model, one JSON file at ~/.pi/agent/models.json adds it. Most people will never need to touch it.)
## Step two: let Pi port your Claude Code setup for you
This is the move that makes the whole thing take an afternoon instead of a week.
Don't rebuild anything by hand. Point Pi at your existing setup and ask it to copy itself over.
The actual prompt I used, more or less:
Review my entire Claude Code setup. My CLAUDE.md, my .claude/skills folder,
my saved prompts and commands, my tool connections. Then write the equivalent
configuration for yourself, optimised for how I actually work.
The agent set up the agent. It read my instruction files, moved my skills across, recreated my shortcuts, and wrote its own config.
I reviewed what it wrote, fixed the few things it got wrong, and I was running.
That's the moment harness engineering stops feeling like admin. Everything below is what it set up, so you know what to check and what to tweak.
## Step three: your context files
Every rule I'd written for Claude Code lived in a single CLAUDE.md. Pi reads CLAUDE.md and AGENTS.md directly, so months of tuning came across untouched.
Two layers worth knowing:
- ~/.pi/agent/AGENTS.md is global. It follows you into every project, so this is where rules about you and how you work go.
- AGENTS.md or CLAUDE.md in a project root is about that project only.
Change either file and run /reload to pick it up without restarting.
If you've spent any time teaching your current agent how you work, that work is portable. You just didn't know it yet.
## Step four: customise the system prompt (the thing Claude Code won't let you do)
This is Pi's killer feature, and it's worth stating plainly. Claude Code and Codex don't let you touch the system prompt. Pi hands you the whole thing.
The system prompt is the agent's standing behaviour, loaded before anything you type. Two files control it, in .pi/ per project or ~/.pi/agent/ globally:
- APPEND_SYSTEM.md adds your rules on top of Pi's default. Safe, reversible, start here.
- SYSTEM.md replaces the default entirely. Powerful, and easy to break. The default is what makes Pi good at editing files and running commands, so don't replace it until you know what it does for you.
My advice: start with a few behaviour rules in APPEND_SYSTEM.md and watch them show up in every session.
It's the difference between renovating a room and knocking the house down.
## Step five: skills and saved prompts
The easiest path here is the same as step two: tell Pi to grab your skills folder and move it over, or point it at the folder you already use and let it wire things up.
Pi uses the same skills standard as Claude Code, so mine came across with zero conversion.
For the prompts you type over and over, drop a markdown file into ~/.pi/agent/prompts/ and it becomes a slash command.
A file called daily-email.md means typing /daily-email fires that whole prompt in a keystroke.
## Step six: build the custom pieces your old harness never had
Because everything in Pi is a file, anything you can describe you can build. This is where harness engineering gets fun.
Example: I wanted the agent to learn as we work, the way tools like Hermes advertise auto-learning memory. So I built it myself in about ten minutes.
A memory file in the project, plus a saved prompt that tells the agent to review the session and append anything worth remembering to that file. Now the agent compounds.
Every session starts smarter than the last one started, and the memory is a markdown file I can read and edit myself.
That's the real point of this step. You're not limited to what the tool ships with.
If you can describe a behaviour, a memory system, a quality gate, a weekly review habit, you can make it part of the harness. Most of my custom pieces are one file and one saved prompt each.
## The day-to-day loop
Once it's set up, everything runs on a handful of commands.
Pick a model with /model and start. Mid-task, if you want a different brain, run /model again and carry on.
Cheap model for testing, strong model for the real work, same setup.
When a conversation gets long, my move is a handoff document. I ask Pi to write a summary of where we are, what we decided, and what's next, saved as a markdown file.
Then I run /new, start a fresh session, and point it at the handoff. Pi doesn't have a "clear" button, and honestly this is better. You get a written record of every long task for free.
And keep an eye on the footer. Pi shows live token count and session cost in real money (or run /session for the full breakdown).
When you can see the meter, you make cheaper choices without thinking about it.
## Why I'd use Pi over Claude Code
Concrete, no manifesto.
You control the system prompt. Claude Code and Codex lock it.
Pi lets you append to it or replace it, per project or globally, which means the agent's personality is yours to shape.
Every part of the harness is a file you own. Context, skills, prompts, model config.
Nothing is hidden behind a UI, so you can version it, back it up, and rebuild it anywhere.
And you can run any model behind your setup. Your files, your skills, your rules, pointed at Claude today, Kimi K3 tomorrow, whatever lands next month.
Worth saying clearly: you don't need a new subscription to do this. Your existing Claude Code subscription logs straight into Pi, so you can try everything in this article on the plan you already pay for.
Cheap model for testing, strong model for real work, no rebuild in between.
Models come and go. The harness you build around them is yours.
## The honest downsides
Pi has no built-in sandbox. It runs with your full permissions, the same as you sitting at your own machine.
That's fine when you trust what you're working on, but anything sitting in a project can try to steer the agent. If you run it on code you don't trust, put it inside a container first. Don't skip that.
It's also young and it moves fast. Things change week to week. If you want a tool that never surprises you, this isn't that yet.
And yes, it's do-it-yourself. Nobody hands you a finished harness. But step two in this article is the shortcut: you ask the agent to build it for you, and the whole thing takes an afternoon instead of a week.
One last honest one. A great harness makes a good model better. It can't make a weak model good. The floor is still the model, so pick a capable one.
## The model gets the headlines. The harness does the work.
If you build anything with AI agents, harness engineering is the skill I'd start on this year. Not prompt tricks. The setup around the model.
In 2026 the models change every few weeks. Something faster or cheaper lands, everyone scrambles, and the people who built a portable harness just swap the brain and keep going.
Save this if you want the map. I'm writing more of it.
The model gets the headlines. The harness does the work.
## 相关链接
- [Tom](https://x.com/tomcrawshaw01)
- [@tomcrawshaw01](https://x.com/tomcrawshaw01)
- [Upgrade to Premium](https://x.com/i/premium_sign_up)
- [9:29 PM · Jul 21, 2026](https://x.com/tomcrawshaw01/status/2079559394942206156)
- [2,088 Views](https://x.com/tomcrawshaw01/status/2079559394942206156/analytics)
---
*导出时间: 2026/7/22 08:57:06*
---
## 中文翻译
# 我在 Pi 内部重构了我的整个 Claude Code 设置。方法如下
**作者**: Tom
**日期**: 2026-07-21T13:29:30.000Z
**来源**: [https://x.com/tomcrawshaw01/status/2079559394942206156](https://x.com/tomcrawshaw01/status/2079559394942206156)
---

关于驾驭工程(harness engineering)的完整教程:它是什么,为什么它比模型本身更重要,以及如何在 Pi 中设置你自己的驾驭环境。
## 什么是驾驭工程?
每个 AI 代理都包含两部分。模型,即你从 Anthropic、OpenAI 或 Moonshot 租用的原始大脑。以及驾驭环境,即你围绕它构建的一切。你的指令、工具、记忆和规则。
该领域已经达成的简略共识是:
代理 = 模型 + 驾驭环境
驾驭工程是一门有目的地配置这第二部分的技艺,以便模型的原始能力转化为你可以信任其处理实际工作的可靠行为。同样的模型,更好的驾驭环境, dramatically 更好的输出。这种差距几乎是你所有杠杆作用的所在。
如果你使用 Claude Code,你其实已经在这么做了。你的 CLAUDE.md、你的 skills 文件夹、你的自定义命令。那就是一个驾驭环境。你一直凭直觉在进行这种工程化。
本教程存在的原因:大约有一年的时间,我的驾驭环境只在一个模型上运行。
当我想让 Kimi K3 处理实际工作时,切换感觉就像要把一切推倒重来。所以我重新构建了整个设置,并将其置于一个名为 Pi 的编码代理内部,在这里驾驭环境只是你可以看到和编辑的普通文件。
这是完整的设置,包括所有命令。
## 第一步:安装 Pi 并登录
```
npm install -g --ignore-scripts @earendil-works/pi-coding-agent
cd /path/to/your-project
pi
```
然后在 Pi 内部:
/login
这一个命令几乎涵盖了你需要的一切。你可以使用现有的 Claude Pro/Max 订阅、ChatGPT/Codex 计划、GitHub Copilot 或 OpenRouter 登录——我就是用 OpenRouter 来运行 Kimi K3 的。
登录一次,该提供商的所有模型就会显示在你的列表中。
从那时起,切换模型只需:
/model
这就完成了整个工作。Ctrl+L 也可以达到同样的效果。
(如果你想要一些内置不支持的特殊功能,比如本地 Ollama 模型,只需在 ~/.pi/agent/models.json 添加一个 JSON 文件即可。大多数人永远不需要去碰它。)
## 第二步:让 Pi 为你迁移 Claude Code 设置
这是让整个过程只需一个下午而不是一周的关键步骤。
不要手工重建任何东西。让 Pi 指向你现有的设置,并要求它将其复制过来。
我实际使用的提示词大致如下:
审查我的整个 Claude Code 设置。我的 CLAUDE.md,我的 .claude/skills 文件夹,
我保存的提示词和命令,我的工具连接。然后为你自己编写等效的配置,
并针对我的实际工作方式进行优化。
代理设置了代理。它读取了我的指令文件,迁移了我的技能,重新创建了我的快捷方式,并编写了它自己的配置。
我审查了它写的内容,修正了它弄错的几个地方,然后我就可以运行了。
那一刻,驾驭工程不再感觉像是行政工作。下面的所有内容都是它设置好的,所以你知道该检查什么以及该调整什么。
## 第三步:你的上下文文件
我为 Claude Code 编写的每一条规则都存在于一个 CLAUDE.md 文件中。Pi 直接读取 CLAUDE.md 和 AGENTS.md,因此数月的调整工作原封不动地迁移了过来。
有两层结构值得了解:
- ~/.pi/agent/AGENTS.md 是全局的。它会跟随你进入每个项目,所以这里是放置关于你和你如何工作的规则的地方。
- 项目根目录中的 AGENTS.md 或 CLAUDE.md 则仅与该项目相关。
更改任一文件并运行 /reload 即可在不重启的情况下加载更改。
如果你花时间教导你当前的代理如何工作,那么这些工作是可移植的。你只是之前不知道而已。
## 第四步:自定义系统提示词(Claude Code 不允许你做的事情)
这是 Pi 的杀手级功能,值得明确指出来。Claude Code 和 Codex 不让你触碰系统提示词。Pi 则将整个控制权交给你。
系统提示词是代理的持久行为,在你输入任何内容之前加载。两个文件控制它,位于每个项目的 .pi/ 目录或全局的 ~/.pi/agent/ 目录中:
- APPEND_SYSTEM.md 在 Pi 的默认设置之上添加你的规则。安全、可逆,从这里开始。
- SYSTEM.md 完全替换默认设置。强大,但容易破坏。默认设置是让 Pi 擅长编辑文件和运行命令的关键,所以在你知道它为你做了什么之前,不要替换它。
我的建议:在 APPEND_SYSTEM.md 中开始添加几条行为规则,然后观察它们出现在每个会话中。
这就像是装修一个房间和推倒整座房子之间的区别。
## 第五步:技能和保存的提示词
这里最简单的路径与第二步相同:告诉 Pi 抓取你的 skills 文件夹并将其移过来,或者指向你已经使用的文件夹,让它自动连接。
Pi 使用与 Claude Code 相同的技能标准,所以我的是零转换迁移过来的。
对于那些你一遍又一遍输入的提示词,将一个 markdown 文件放入 ~/.pi/agent/prompts/,它就会变成一个斜杠命令。
一个名为 daily-email.md 的文件意味着输入 /daily-email 就能一键触发整个提示词。
## 第六步:构建你旧的驾驭环境中从未有过的自定义组件
因为 Pi 中的一切都是文件,任何你能描述的东西你都能构建。这是驾驭工程变得有趣的地方。
例如:我希望代理在我们工作时能学习,就像 Hermes 等工具宣传的自动学习记忆那样。所以我自己在十分钟内构建了它。
项目中的一个记忆文件,加上一个保存的提示词,告诉代理审查会话并将任何值得记住的内容附加到该文件中。现在代理能够不断积累。
每个会话的开始都比上一个会话的开始更聪明,而且记忆是一个我自己可以阅读和编辑的 markdown 文件。
这才是这一步的真正意义。你不仅限于工具自带的功能。
如果你能描述一种行为、一个记忆系统、一个质量关卡、一个每周审查的习惯,你就可以让它成为驾驭环境的一部分。我的大多数自定义组件都只是一个文件和一个保存的提示词。
## 日常工作流程
一旦设置完成,一切都在少数几个命令上运行。
使用 /model 选择一个模型并开始。任务进行到一半,如果你想要一个不同的大脑,再次运行 /model 并继续。
测试用廉价模型,实际工作用强力模型,设置相同。
当对话变长时,我的做法是使用交接文档。我让 Pi 写一份关于我们目前进度、我们决定了什么以及接下来要做什么的总结,并保存为一个 markdown 文件。
然后我运行 /new,开始一个新的会话,并让它指向交接文档。Pi 没有“清除”按钮,老实说这样更好。你可以免费获得每个长任务的书面记录。
还要留意页脚。Pi 显示实时的 token 计数和以真实货币计算的会话成本(或运行 /session 查看完整细分)。
当你能看到计价器时,你会不自觉地做出更便宜的选择。
## 为什么我选择 Pi 而不是 Claude Code
具体,不谈宣言。
你可以控制系统提示词。Claude Code 和 Codex 将其锁定。
Pi 允许你追加或替换它,按项目或全局进行,这意味着代理的性格由你来塑造。
驾驭环境的每一部分都是你拥有的文件。上下文、技能、提示词、模型配置。
没有什么隐藏在 UI 后面,所以你可以对其进行版本控制、备份,并在任何地方重建。
而且你可以在设置后面运行任何模型。你的文件、你的技能、你的规则,今天指向 Claude,明天指向 Kimi K3,下个月无论出现什么。
值得清楚说明的是:你不需要新的订阅来做到这一点。你现有的 Claude Code 订阅可以直接登录 Pi,所以你可以在你已经付费的套餐上尝试本文中的所有内容。
测试用廉价模型,实际工作用强力模型,中间无需重建。
模型来来去去。你围绕它们构建的驾驭环境属于你自己。
## 诚实的缺点
Pi 没有内置的沙盒。它以你的完整权限运行,就像你坐在自己的机器前一样。
当你信任你正在处理的内容时,这没问题,但项目中任何东西都可能试图引导代理。如果你在不信任的代码上运行它,请先将其放入容器中。不要跳过这一步。
它还很年轻,发展很快。事情每周都在变。如果你想要一个从不让你感到意外的工具,这目前还不是。
是的,这是自己动手做的。没有人会给你一个现成的驾驭环境。但本文中的第二步就是捷径:你让代理为你构建它,整个过程只需要一个下午而不是一周。
最后一个诚实的缺点。好的驾驭环境能让好模型变得更好。它不能让弱模型变好。底线仍然是模型,所以要选择一个有能力的模型。
## 模型占据头条。驾驭环境负责工作。
如果你用 AI 代理构建任何东西,驾驭工程是我今年会开始磨练的技能。不是提示词技巧。而是模型周围的设置。
在 2026 年,模型每几周就会变化。出现更快或更便宜的东西,每个人都在争先恐后,而那些构建了可移植驾驭环境的人只需交换大脑并继续前进。
如果你想获取路线图,请收藏本文。我正在写更多相关内容。
模型占据头条。驾驭环境负责工作。
## 相关链接
- [Tom](https://x.com/tomcrawshaw01)
- [@tomcrawshaw01](https://x.com/tomcrawshaw01)
- [升级到 Premium](https://x.com/i/premium_sign_up)
- [2026年7月21日 下午9:29](https://x.com/tomcrawshaw01/status/2079559394942206156)
- [2,088 次观看](https://x.com/tomcrawshaw01/status/2079559394942206156/analytics)
---
*导出时间: 2026/7/22 08:57:06*