# How to create a game-ready 2D sprite sheet for ANY animation
**作者**: Ronnie Stein
**日期**: 2026-05-01T18:13:36.000Z
**来源**: [https://x.com/LayrKits/status/2050277473116619240](https://x.com/LayrKits/status/2050277473116619240)
---
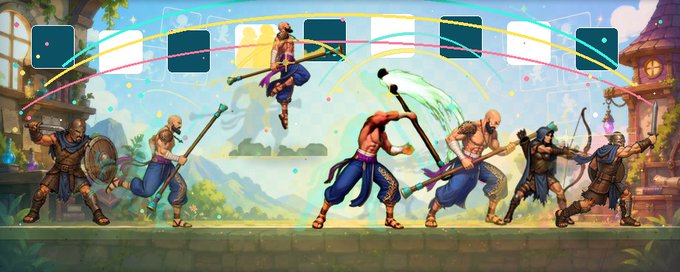
# Preface
Like a lot of the video game enthusiasts, there came a time when I could no longer resist my nature and I prompted Codex to make me a game.
I ran into some issues with animations Codex made for me and this is how I solved them.
If you are here just for the pipeline, feel free to skip the next section. If you're interested in the journey and not only in the destination, read on!
## The Journey
Long before AI existed, I dipped my toe into game dev. Like most, I eventually settled in Unity and spent a few years working with it. I had multiple ideas for completely different games, starting from a point and click adventure to co-op story driven RPG.
I tried building solo, I tried building with friends. My personal time limitation was a constraint, but not a big enough hurdle to keep me from coding a lot of the game's systems. The biggest issie for me was the graphics.
Though I have grown up with the 90s games, I was never a fan of pixel art and always wanted my games to have a stylized look. They didn't have to be on the cutting edge of graphics. But they had to have character.
I've looked into hiring artists, but even a concept art piece would set me back way too much money for my wallet at the time. I've looked into making graphics myself. Drawing was never my thing, though it turned out I could scultp decently well in Blender. After only 150 hours I had a character!
A character that, as it turned out, I had no chance of using in a video game. A character that, as it turned out, was insanely difficult to animate even if I figured out the mesh problem. Long story short, another project was abandoned.
Fast forward to today, and Codex one-shots a game that I discribed in one paragraph. Now, I know what you're thinking: he's full of shit, nothing can get one-shotted, especially a game. And you would be partially right.
The game had basic graphics made of shapes and it wasn't too fun to play, but it worked!
Main character could run, jump, attack and had a magic attack. Enemies rushed the Core, stopped to attack the player or NPC defenders. There was a health pool, mana pool, resource pool, a loosing condition and even a defeat animation! All the things we take for granted in the game were done for me from one prompt!
Absolute heaven! All I had to do was to create a few sprite sheets to replace the sticks and stones graphics. No big deal!
Uhh, yes a big deal! It wasn't that easy.
And if you've read this far you probably know where I ran into an issue. Image models cannot follow strict rules. Why does it matter? Because a sprite sheet must be layed out in a mathematical order so that the game engine can access each frame programmically. In other words it must be divided into perfect frames and the character must be always in the middle of the frame. That last one is important or you'll get character jitters while the animation is playing.
On top of that, the background must be transparent and not all the models can handle that either!
I spent 2 days, dozens of prompt variations, reference grid variations and nothing worked! I was ready to give up... One thing that stopped me was the fact that the AI wrapper tools, that I've tried for this specific task, did not always listen to what I wanted in my animation. There would be some super weird results even after my prompts were cleaned by their own AI helpers.
Thankfully, both of these issues (the framing and background transaprency) were solved long ago, programmically. Once I found that route, it wasn't long before I, with AI's help and guidance, had a couple of scripts that took a malformed product from the image model, and produced a solid sprite sheet with clean margins and a transparent background.
Hazzah! The day is won!
Nope. Celebrated early again.
Those of you who have tried using the image model to create sprite sheet frames will probably know where this is going. Those models don't understand walking. Or running. They don't get how legs work! You can tell them EXACTLY where each leg is supposed to be, how the foot is suppsed to be turned, and they will still mess it up. Even in pixel graphics! I think the only style that was more or less spared is top-down, where there are only 2 variations of where the feet should be. Thank the wonder of AI science!
That was it, a dead end. I ran so many prompts I've lost count. I made 10 by 5 sprite sheets and tried selecting the frames that looked like they would be a decent progression from one another. Nothing worked well. Some attempts came close, but that is not a pipeline that I would care to use multiple times for sub-par results. And I would not recommend it to anyone.
A post on the X saved me. A short reply to somebody having a similar problem as me. "use kling and just extract frames" (I'm paraphrasing here, I saw it 2 weeks ago and I can't find the author or the post)
What?! I originally dismissed it. It sounded like the author suggested for me to kill a mosquito with an axe. But then I looked into it. And it was a viable solution! Video models do not have the same issue with legs! In fact, they do not have an issue with any motion. And frame extraction was solved so long ago that I didn't even have to look for a tool, it jumped into my lap! Moreover, I already had 99% of the remaining pipeline completed. All I had to add is a script for stitching together frames from multiple files, which Codex wrote in minutes!
There are a few things to consider when prompting an video model to make sure the resulting video is viable, but it wasn't hard to figure out, and I'll drop the tips below.
Whew! Victory!
I am extremely happy with how the pipeline works. I've even experimented with stitching some animations together and it worked quite well; although it needed some tuning it terms of new frame validation. But Codex does an amazing job once this workflow is wired into the project.
Without furthere ado, I hope you enjoy the workflow below!
## The Pipeline
This is the technical version of the workflow. This was mostly written by an AI with my writing sprinkled throughout to provide tips and commentary. I recommend for you to at least read the first 2 steps to understand how to prompt the image and video models to get the best results. I curated these guidelines from dozens of iterations and you can dump them into your agent and make it convert your simple prompts into ones ready for the models. Steps 3 and beyond are meant for your coding agent. I have tested and perfected them through multiple clean runs. Copy, paste, tell your agent to build the scripts as described and run the workflow on your videos!
There is a Tips and Tricks section at the bottom. It is meant for you, the reader. Make sure to read these, as there is a money saving tip at the end!
Good luck, have fun!
1. Create the first animation-safe pose
Create one full-body character image with an image model, such as GPT Image 2 or Nano Banana 2. This image becomes the first frame for the video model.
Use exact chroma green:
- Hex: #00FF00
- RGB: 0,255,0
The background must be perfectly flat. No shadows, floor, gradients, props, lighting falloff, or background objects. The character design must not use this green anywhere, including clothing, gems, magic, outlines, antialiasing, or glow.
Frame the character for animation, not as a portrait:
- Full body visible from head to feet
- Full weapon, cape, hair, loose cloth, and accessories visible
- No cropping
- Character centered in frame
- Generous empty margin on all sides
- No part of the character enters the outer 20-30% border area
- For idle/game animation, character height should usually be about 40-50% of the canvas
This matters because video models often animate wider than the first pose suggests. If a weapon, cape, hand, foot, hair, or effect starts near the edge, Kling may push it out of frame once motion begins.
For any animation other than idle, I usually create a transition pose with the image model before going to video. Give the image model the base character reference, then ask for the first frame of the new animation as a small transition away from idle. Do not ask for the most extreme pose first. This helps attacks, runs, jumps, casts, hits, and landings flow naturally instead of snapping into a disconnected stance.
For very simple pixel sprites, this transition pose can be the most important control step. For example, with a tiny classic RPG walk cycle, first create a walking-pose image: one foot shifted a few pixels, the other foot shifted back, slight knee bend, tiny weapon/shield arm bob, same view, same scale, same background. Then use that image as Kling's first frame with a short prompt. Simple drawings often need less prompt engineering, not more.
The image prompt should specify:
- One character only
- Full-body 2D game character
- Exact starting pose
- Camera/view angle
- Character centered in frame
- Animation-safe margins
- Full weapon/effects visible
- Clean readable silhouette
- Stable design with clearly separated limbs
- Flat #00FF00 background only
- No text, watermark, border, shadow, floor, props, gradients, or extra effects
After generation, verify that the background is actually exact #00FF00. If the model creates a soft green gradient or near-green pixels, flatten the border-connected background to exact #00FF00 before using the image for animation. Reject or fix any image with cropped limbs, cropped weapons, portrait framing, shadows, green on the character, extra props, extra characters, or important pixels near the edge.
2. Animate that pose in Kling
Use the image-model result as Kling's first frame. The output is controlled source footage for a sprite pipeline, not cinematic video.
Kling usually gives you one prompt field, so put the motion, preservation rules, camera rules, background rules, and avoid constraints into one copy-paste prompt. Do not rely on a separate negative prompt unless your tool actually provides one.
Scale the prompt to the asset. For simple drawings and tiny pixel sprites, first make a transition pose image, then use a short literal Kling prompt. Long direction-lock prompts can give Kling more ideas to reinterpret, causing travel, rotation, or redesign.
For simple classic RPG pixel sprites, avoid phrases like top-down 3/4 or isometric unless the first frame is truly diagonal. Those phrases can make Kling rotate the character or walk in different directions. Prefer wording like:
```
Use the uploaded image as the exact first frame.
Animate a tiny retro RPG sprite marching in place.
Keep the character pinned to the center of the screen.
Keep the same front-facing view for the entire clip.
The character must not turn, rotate, face diagonally, face sideways,
move forward, move backward, or move across the screen.
Only animate a simple two-step pose cycle:
the feet alternate a few pixels, the knees bend slightly,
and the weapon arm and off-hand/shield arm bob slightly.
Keep the head, chest, body angle, equipment sides, size, colors,
and pixel-art design the same.
Locked camera.
Flat #00FF00 green background stays unchanged.
No shadows, no floor, no effects, no blur, no new details, no redesign.
```
For more complex animations, the Kling prompt can be more mechanical. Include only the constraints that change the pixels:
- Use the uploaded image as the exact first frame
- Preserve character design, outfit, proportions, weapons, face, and 2D art style
- Describe the visible action in plain body-motion language
- Locked camera
- No zoom, pan, rotation, cuts, shake, dolly, or depth movement
- Character stays centered and the same size on screen
- Full body, weapons, and effects stay inside the frame
- Fixed facing direction with no yaw into neighboring directions
- Flat #00FF00 background with no floor, shadows, gradients, lighting changes, props, text, watermark, or motion blur
Do not describe the action vaguely.
Bad:
```
fast overhead sword slash
```
Good:
```
Use the uploaded image as the exact first frame.
Create an overhead sword attack.
The character makes a small weight shift,
raises the sword overhead,
pauses briefly in anticipation,
steps forward slightly,
strikes downward,
follows through,
then returns toward the ready stance.
Keep the camera locked,
the character centered,
the full body and sword inside the frame,
and the flat #00FF00 background unchanged.
```
For isometric walks, be careful not to imply travel through depth. Use walk-in-place, say the character faces the direction, and explicitly prevent dolly movement or size change. For cardinal south/down walks, forbid yaw into south-east or south-west if Kling starts drifting.
For vertical animations such as jump, fall, and landing, generate the body motion cleanly first. Add landing dust, takeoff wind, or other vertical effects as separate overlay animations. Foot-level effects can make Kling drift the character up or down inside the frame.
Be careful using the same image as both the first and final frame. Sometimes the model interprets that as "hold this image" and creates a still video. If needed, skip the final-frame input, then choose a good ending frame from the generated footage.
If the motion is good but the ending does not connect back to idle or into the next animation, do not automatically rerun the whole video. Ask an image model for one or a few bridge frames. Image iterations are often cheaper and faster than another video generation.
> AGENT HANDOFF
> From this point on, the steps are meant for your coding agent. You can copy/paste the instructions below into your project and ask the agent to build the local scripts, then run the pipeline on the videos you created in Steps 1 and 2. There are no secrets or paid APIs in the local part of the workflow, just files, Python scripts, FFmpeg, and Pillow.
3. Extract full-resolution frames from the video
Create this script as tools/extract_frames_ffmpeg.py.
If you are giving this section to a coding agent, ask it to create a deterministic local Python CLI wrapper around ffmpeg and ffprobe (system command-line tools from the FFmpeg project; ffprobe ships with FFmpeg; install with Homebrew/apt/winget or from ffmpeg.org/download.html, not pip/npm). No APIs, no secrets, no hosted services. The script's job is to turn one video into a numbered folder of full-resolution PNG frames and a JSON report.
Use whatever folder structure you like. In the examples below, placeholders mean:
- <source-video>: the animation video you downloaded from the video model
- <run-dir>: a temporary working folder for this one animation, such as work/runs/2026-04-28_mage_attack_01
- <character>: your character name, such as mage
- <animation>: your animation name, such as attack_01
- <frame-count>: usually 12 or 24
Implementation contract:
- script path: tools/extract_frames_ffmpeg.py
- dependencies: Python standard library plus system ffmpeg and ffprobe
- input: one video file
- output: one directory of ordered PNG frames
- default behavior: extract every decoded source frame in playback order
- optional behavior: constant-FPS sampling when --fps is provided
- optional behavior: FFmpeg crop expression when --crop is provided
- output naming: frame_0001.png, frame_0002.png, etc.
- report path: <output-dir>/extraction_report.json
Required CLI:
```
python tools/extract_frames_ffmpeg.py \
--input "<source-video>" \
--output-dir "<run-dir>/extracted/<character>/<animation>" \
--overwrite
```
Recommended arguments:
- --input: source video path
- --output-dir: destination folder for full-resolution PNGs
- --fps: optional output FPS, omitted by default
- --crop: optional FFmpeg crop expression, omitted by default
- --pattern: optional output pattern, default frame_%04d.png
- --start-number: optional start number, default 1
- --overwrite: allow replacing existing matching frame files
The report should include:
- input path
- output directory
- output pattern
- requested FPS, if any
- crop expression, if any
- mode: source-frame-passthrough or constant-fps
- source metadata from ffprobe: width, height, frame rate, duration, frame count
- extracted frame count
- exact FFmpeg command used
Important rule: do not crop tightly around the character. The full video canvas is part of the alignment strategy. Cropping the canvas changes scale and can create fake camera movement between animations. If a video has a fixed corner watermark, remove it later with a fixed transparent box on the 256px output cells instead of cropping away the canvas.
4. Choose the frames that become the sprite animation
This step has two small scripts:
- visual review: tools/make_contact_sheet.py
- manual frame selection: tools/select_frames.py
This is a visual review step. The coding agent should create the contact sheet, inspect it if it has image-viewing ability, choose explicit animation beats, and then run the selection script. If the coding agent cannot view images, it should stop here and ask the human to choose frame numbers from the contact sheet.
The contact sheet script helps you see the whole video at once. The selection script creates ordered source folders for the final 12-frame and 24-frame exports.
tools/make_contact_sheet.py implementation contract:
- dependencies: Python plus Pillow
- input: a directory of extracted image frames
- sorting: natural filename sort, so frame_0010.png comes after frame_0009.png
- output: one numbered contact sheet PNG
- each cell should show a thumbnail of the frame and a visible frame number
- the script should not modify source frames
Required CLI:
```
python tools/make_contact_sheet.py \
--source-dir "<run-dir>/extracted/<character>/<animation>" \
--output "<run-dir>/contact_sheets/<character>_<animation>_raw_contact.png" \
--cols 12 \
--cell-size 128 \
--image-size 112
```
tools/select_frames.py implementation contract:
- dependencies: Python standard library
- input: a directory of extracted image frames
- input indices: 1-based frame numbers
- support comma-separated indices, such as 1,6,11,17
- support inclusive ranges, such as 24-48
- output: a new folder containing only the selected frames
- output naming: <frame-prefix>_0001.png, <frame-prefix>_0002.png, etc.
- report path: <output-dir>/selection_report.json
- report data: a short beat label or selection note for each selected output frame
Required CLI:
```
python tools/select_frames.py \
--source-dir "<run-dir>/extracted/<character>/<animation>" \
--output-dir "<run-dir>/selected/<character>/<animation>/12f" \
--indices "1,6,11,17,22,27,32,38,43,49,54,60" \
--frame-prefix "<character>_<animation>_12f"
```
The selection report should include:
- source directory
- output directory
- total source frame count
- selected frame count
- selected source indices
- per-frame mapping from output frame back to source frame
- beat labels or selection notes, such as ready, anticipation, contact, follow-through, or recovery
Most of the time I create both a 12-frame and a 24-frame version. The 12-frame sheet is usually the game asset. The 24-frame sheet is useful for smoother reference, slower actions, or animations with large effects.
Frame selection is not "skip idle frames, then evenly sample whatever remains." That often starts the final sheet in a weird spot. First inspect the contact sheet and choose the frames that make the animation readable as a game sprite.
Use this order:
- choose frame 1 first: it should be the playable start pose, usually ready stance, a transition away from idle, or the first clear anticipation pose; do not start mid-swing, mid-fall, or after the effect has already begun
- choose the final frame second: it should be a clean recovery, settle, landing, or handoff back to idle or the next game state
- choose the key action beats between them: anticipation, lift-off, windup, contact, apex, impact, follow-through, recoil, recovery, or whatever beats match that animation
- only after those anchor frames are chosen, fill the gaps with evenly spaced in-betweens
- remove frames that are blurry, malformed, duplicate-looking, missing limbs, missing weapons, or visually out of order
- preserve VFX frames unless the human explicitly asked to remove that effect; takeoff wind, landing dust, magic arcs, and impact plumes are part of the animation timing
- keep the original canvas for every selected frame; frame selection must not crop, recenter, bottom-align, or move frames
For a 12-frame sheet, pick the clearest readable beats first and use fewer in-betweens. For a 24-frame sheet, keep the same start frame, final frame, and main beat frames as the 12-frame sheet, then add more in-betweens around those same beats. Do not let the 24-frame selection use a different action window unless you intentionally want a different animation.
The selection report should make this auditable. It should not only say 1,6,11,17. If the coding agent selected the frames, it should say why those frames were selected, for example: 1 ready, 6 anticipation, 17 contact, 32 impact, 49 follow-through, 60 recovery. If a human provided the exact indices, the report can say human-selected instead.
5. Skip this unless you failed to get a clean green background
Create the fallback matting script as tools/matte_light_background.py.
This script is only for rescue work. It is not the normal green-screen remover. The preferred path is still exact #00FF00 chroma green, and that gets removed later by tools/animation_pipeline.py in Step 6. Use this matte script only when a source has an off-white, gray, or lightly tinted background and you cannot regenerate it cleanly.
Implementation contract:
- dependencies: Python plus Pillow
- input: a directory of image frames
- output: a new directory of PNG frames with alpha transparency
- sorting: natural filename sort
- method: estimate the background color from frame corners or border pixels
- remove pixels close to that estimated background
- use a soft alpha edge so the sprite does not look jagged
- preserve all frame ordering and filenames or use a predictable renamed pattern
- report path: <output-dir>/matte_report.json
Required CLI:
```
python tools/matte_light_background.py \
--source-frames-dir "<run-dir>/extracted/<character>/<animation>" \
--output-dir "<run-dir>/matted/<character>/<animation>" \
--frame-prefix "<character>_<animation>_matted"
```
The report should include:
- source directory
- output directory
- frame count
- estimated background colors
- tolerance or threshold settings
- per-frame warnings if too much foreground was removed
Do not use this when the background is clean chroma green. Chroma removal is simpler, more deterministic, and less likely to eat glow, fabric, hair, weapon highlights, or magic effects.
6. Remove the green background and build the sprite sheet
Create the main pipeline script as tools/animation_pipeline.py. This is the core of the local pipeline.
If you give this step to a coding agent, ask it to build one Python CLI that takes selected frame folders, removes the chroma green background, and produces game-ready transparent sprite cells plus a horizontal sprite sheet.
Implementation contract:
- dependencies: Python plus Pillow
- input mode 1: --source-frames-dir, a directory of ordered source frames
- input mode 2: --source, a legacy source sheet, optional
- output: individual transparent 256x256 PNG cells
- output: one horizontal transparent PNG sprite strip
- output: one preview PNG on a checker/guide background
- output: one JSON validation report
- sorting: natural filename sort
- default frame size: 256
- default background mode: chroma
- default chroma key: #00FF00
Required CLI for a 12-frame export:
```
python tools/animation_pipeline.py \
--source-frames-dir "<run-dir>/selected/<character>/<animation>/12f" \
--frames 12 \
--output "<run-dir>/sheets/<character>/<animation>/<character>_<animation>_12f_256.png" \
--preview "<run-dir>/previews/<character>/<animation>/<character>_<animation>_12f_256_preview.png" \
--frames-dir "<run-dir>/frames/<character>/<animation>/12f_256" \
--report "<run-dir>/reports/<character>/<animation>/<character>_<animation>_12f_256_report.json" \
--background-mode chroma \
--layout-mode preserve-canvas \
--frame-prefix "<character>_<animation>_12f"
```
Run the same command again for the 24-frame export, changing 12f to 24f, --frames 12 to --frames 24, and pointing at the 24-frame selected source folder.
The script should support these background modes:
- chroma: remove exact/near #00FF00 background and despill green edges
- alpha: preserve existing transparency and skip chroma removal
For chroma removal, the coding agent should implement this directly with Pillow pixel processing. Convert each frame to RGBA. For each non-transparent pixel, if it is exact #00FF00 or close to the configured key color within a tolerance, set alpha to 0. Also catch strongly green background spill with a rule like "green is high, red/blue are low, and green is much larger than both red and blue." For edge pixels that are not removed but still have green spill, clamp the green channel down toward the larger of red/blue instead of making the pixel transparent. Be conservative here: do not remove pixels just because they contain some green, or you may destroy cyan weapon tips, green gems, magic effects, or antialiased costume details.
The script should support these layout modes:
- preserve-canvas: scale the entire source video canvas into each 256x256 cell
- fit-foreground: optional legacy rescue mode that crops around the foreground and recenters it; do not use this for video-generated animations
Use preserve-canvas for video-generated animation. This is the important part. Do not crop each pose independently. Do not recenter each pose independently. That creates fake camera movement. In preserve-canvas mode, every frame uses the same source canvas dimensions, the same scale, and the same paste location. If the source video is 960x960, each frame is scaled from that full 960x960 canvas into the 256x256 cell.
Do not add a second per-frame alignment pass after preserve-canvas. In this workflow, the 256x256 cell represents the fixed video camera. The character, feet, dust, wind, cape, weapons, and landing or takeoff effects must stay wherever they were inside that camera. The script must not move frames to a shared bottom edge, shared ground line, bounding-box center, or lowest-alpha pixel. Those operations create artificial motion and can pin jump or landing frames to the bottom of the cell.
Reference grids are not part of this local processing step. The full source video canvas is the reference. If the source video shows unwanted body drift inside the fixed camera, fix that in the video prompt and regenerate with locked camera, centered character, and enough margin. Do not repair it by shifting individual sprite cells in the cleanup script. A game engine origin can be defined later in the engine/import settings; it should not rewrite the pixels in this sprite-sheet pipeline.
The processing sequence should be:
- load source frames in natural order
- remove chroma green if --background-mode chroma
- despill green edge pixels without destroying cyan/green weapon details
- remove tiny isolated noise components
- if --layout-mode preserve-canvas, scale the whole source canvas into the fixed output cell
- if --layout-mode fit-foreground, crop the visible foreground and align it to a consistent anchor
- write individual 256x256 cells
- stitch those cells into one horizontal strip
- write a checker-background preview
- write a report
The report should include:
- status: pass or fail
- errors
- warnings
- frame count
- frame size
- sheet size
- source paths
- output paths
- scale used
- layout mode
- source canvas size per frame
- scaled canvas size per frame
- paste location per frame
- final bounding box per frame
- source edge-alpha counts
- adjacent-frame silhouette differences
- possible duplicate frames
- possible motion pops
- possible clipping or edge contact
- frame height/width variance
Expected output sizes:
- 12 frames at 256x256: sheet is 3072x256
- 24 frames at 256x256: sheet is 6144x256
Optional watermark cleanup:
Some video tools place a tiny fixed logo in the lower-right corner. Chroma removal will not remove that because it is real foreground-colored text. Add a small optional cleanup helper or CLI flag that clears a fixed transparent rectangle inside each final 256x256 cell. For a 256x256 cell, a useful lower-right logo box is often:
```
x0=200, y0=236, x1=256, y1=256
```
Apply this only when the watermark exists and only after reviewing that no real weapon, body part, or effect needs that exact corner. This is safer than cropping the whole source video because it does not change the animation canvas.
7. Review the output before copying it into your game assets
Do not ship raw extracted frames. Only promote outputs that pass review.
Validation checklist:
- report status is pass
- sheet size is exactly frame_count * 256 by 256
- source canvas is stable across frames
- preserve-canvas reports show the same scale, scaled canvas, and paste location for every frame
- no per-frame bottom alignment, ground-line alignment, bounding-box recentering, or lowest-alpha alignment was applied
- frame order feels correct when viewed as a strip or animation
- no weapon, limb, cloth, hair, cape, or effect is accidentally clipped by the pipeline
- duplicate-looking frames are intentional holds
- motion-pop warnings have been reviewed visually
- edge-contact warnings have been checked against the original video
- apparent character scale matches the rest of the character set
- lower-right watermark/logo pixels are removed if the source had them
Edge-contact warnings need judgment. If the original source video already has a staff, plume, or magic arc touching the 960x960 border, the report should warn you. That does not always mean the pipeline failed. It means the source content reached the source canvas edge. If the pipeline used preserve-canvas mode and did not crop the source, it cannot recover pixels that the video model never generated.
Suggested generic promoted folder structure:
```
final_sprites/
<character>/
<animation>/
sheets/
<character>_<animation>_12f_256.png
<character>_<animation>_24f_256.png
frames/
12f_256/
<character>_<animation>_12f_01.png
<character>_<animation>_12f_02.png
24f_256/
<character>_<animation>_24f_01.png
<character>_<animation>_24f_02.png
```
Promotion is just copying the reviewed sheet PNGs and the exact reviewed cell PNGs into that final folder. Keep the cleanup/work folders too. They are useful when you need to inspect raw frames, selection reports, pipeline reports, or regenerate a sheet with different frame choices.
8. Rebuild the local preview gallery
Create the viewer-manifest script as tools/build_sprite_gallery_manifest.py.
The static viewer does not search the file system at runtime. It reads a generated JavaScript manifest. After every promotion, rebuild that manifest.
Implementation contract:
- dependencies: Python standard library plus Pillow for reading image dimensions
- input: your promoted sprite folder, for example final_sprites/
- skip individual frame folders
- include only promoted sheet images
- collect metadata for each sheet
- sort newest outputs first
- write a JavaScript file consumed by sprite_viewer.html
- default output: sprite_gallery_manifest.js
Required CLI:
```
python tools/build_sprite_gallery_manifest.py \
--folder "final_sprites" \
--output "sprite_gallery_manifest.js"
```
The manifest entries should include:
- label
- relative path
- containing folder
- project or game name, optional
- character
- animation
- width
- height
- byte size
- modified timestamp
The generated file can be simple:
window.SPRITE_LATEST_LIMIT = 10;
window.SPRITE_SHEETS = [
{
"label": "mage_attack_01_24f_256",
"path": "final_sprites/mage/attack_01/sheets/mage_attack_01_24f_256.png",
"character": "mage",
"animation": "attack_01",
"width": 6144,
"height": 256
}
];
I highly recommend asking your coding agent to build a tiny static HTML viewer, for example sprite_viewer.html. It is not part of the game. It is just a local inspection tool, but it makes it much easier to compare outputs before wiring them into the engine.
Keep it simple. A useful viewer should:
- load sprite_gallery_manifest.js
- list the newest sheets first
- filter by project/game if you use that field, character, and animation
- show the full selected sheet
- play the sheet as an animation by stepping through fixed-width cells
- let you switch between common FPS values
- show basic metadata: frame count, cell size, sheet dimensions, file path
- use a checker or dark background so transparency issues are visible
9. Stage temporary files for manual cleanup
This step is recommended because extracted full-resolution PNG frames can take up a lot of disk space. A single animation is not terrible, but a real character set adds up quickly.
Do not ask the coding agent to delete files. Deleting local files is one of those actions where it is safer for the human to make the final call.
Instead, ask the coding agent to move bulky temporary folders into a clearly named cleanup folder, then you can trash that folder yourself after checking that the final sprites are safely promoted.
If you use an intake folder named something like To be processed, treat it as an inbox, not storage. After a video has been extracted, selected, processed, reviewed, and either promoted or rejected, move that source video out of the intake folder. Otherwise the next run may process the same video again.
Recommended pattern:
```
cleanup_ready_to_trash/
<character>_<animation>/
extracted/
selected/
matted/
rejected_source_videos/
processed_source_videos/
<character>_<animation>/
accepted_source_video.mp4
```
Usually safe to stage for cleanup after final review:
- full-resolution extracted frames
- selected intermediate frame folders
- matted fallback frames, if used
- old rerun folders for rejected attempts
- rejected source videos that you are sure you will not use
Usually worth keeping:
- final promoted sheets and frame cells
- contact sheets, if you want a record of frame choices
- JSON reports, if you want reproducibility/debugging
- accepted source videos, moved out of the intake folder and kept in processed_source_videos/ until you are sure the animation is final
Optional: Resize the finished sprite sheet
For smaller exports, create tools/resize_sprite_sheet.py.
For anyone recreating it with an AI coding model: this should resize a horizontal sprite sheet from one fixed cell size to another, preserve the frame count, validate that the source dimensions match the expected cell size, and write a resize report next to the output.
That is the whole flow: GPT Image 2.0 or Nano Banana 2 for the first pose, Kling for motion, then local scripts for extraction, review, cleanup, validation, and final sprite-sheet packaging.
## Tips and Tricks
These are the practical lessons from the pipeline, collected in one place.
- Frame the first pose for animation, not as a portrait. Keep the full body, weapon, cape, hair, and loose cloth inside the image with generous empty margin.
- Video models tend to animate wider than the first pose suggests. If a weapon, cape, hand, foot, or effect starts near the edge, it may leave the frame once motion begins.
- For most non-idle animations, start from a transition pose instead of an extreme action pose. A small move away from idle usually connects better in-game. Use image model to produce it from your idle frame (or preceding animation end frame)
- Prompt video models mechanically. Describe the exact sequence: anticipation, action, follow-through, recovery. Avoid vague prompts like "fast sword attack."
- Keep the camera locked. Ask for no zoom, no pan, no rotation, no cuts, no camera shake, and no horizontal travel across the screen.
- Keep the animation readable in about 12-24 frames. The motion should progress clearly frame to frame without teleporting, snapping, or skipping important poses.
- Be careful with vertical animations like jump, fall, and landing. Generate the body motion cleanly first. Add landing dust, takeoff wind, or other vertical effects separately as their own overlay/effect animation.
- Non-vertical effects are usually safer. A magic trail during an attack, for example, is much less likely to cause annoying character drift.
- Using the same image as both the first and final video frame can occasionally make the model output a still video. It is rare, but if it happens, skip the final-frame input and choose a good ending frame from the generated video instead.
- If the final pose is good but does not connect well back to idle or into the next animation, use image generation to create one or a few bridge frames. This is often cheaper than rerunning the video.
- If the final animation from sprite sheet seems to be getting 'stuck', check the last frames. They often look too alike with the first frames making the animation seem like it is stuck. Out of the few last frames, select the best that you think will transition the best into the first. Tell the your AI to remove the rest. With this pipeline it has the tools to do that easilty.
- If you're happy with your animation but the end frame is too far off from your idle animation you can tell the model to generate an image that would fit well between the end frame of animation A and first frame of animation B. Or a few frames. Works really well, but not every time, so you may have to ask for a few iterations, but since image gen is now dirt cheap, it's much better than re-running the video prompt.
- If you want to save money, you can create most of your animations with just an image model. It is a much more frustrating process but it is possible. Here is how: ask your code agent within this project to create a reference grid for the desired number of frames. Ask it to create a prompt for an animation sprite sheet for an image model (make sure you tell it it's for an image model). Provide it with the result. It already has the needed tools to properly extract, arrange and clean the frames from the sprite sheet. It will adapt them accordingly.
## 相关链接
- [Ronnie Stein](https://x.com/LayrKits)
- [@LayrKits](https://x.com/LayrKits)
- [16K](https://x.com/LayrKits/status/2050277473116619240/analytics)
- [#00FF00](https://x.com/search?q=%2300FF00&src=hashtag_click)
- [#00FF00](https://x.com/search?q=%2300FF00&src=hashtag_click)
- [#00FF00](https://x.com/search?q=%2300FF00&src=hashtag_click)
- [#00FF00](https://x.com/search?q=%2300FF00&src=hashtag_click)
- [#00FF00](https://x.com/search?q=%2300FF00&src=hashtag_click)
- [ffmpeg.org/download.html](https://ffmpeg.org/download.html)
- [#00FF00](https://x.com/search?q=%2300FF00&src=hashtag_click)
- [#00FF00](https://x.com/search?q=%2300FF00&src=hashtag_click)
- [#00FF00](https://x.com/search?q=%2300FF00&src=hashtag_click)
- [#00FF00](https://x.com/search?q=%2300FF00&src=hashtag_click)
- [2:13 AM · May 2, 2026](https://x.com/LayrKits/status/2050277473116619240)
- [16K Views](https://x.com/LayrKits/status/2050277473116619240/analytics)
- [View quotes](https://x.com/LayrKits/status/2050277473116619240/quotes)
---
*导出时间: 2026/5/2 09:58:27*
---
## 中文翻译
# 如何为任何动画制作游戏级的2D Sprite序列帧
**作者**: Ronnie Stein
**日期**: 2026-05-01T18:13:36.000Z
**来源**: [https://x.com/LayrKits/status/2050277473116619240](https://x.com/LayrKits/status/2050277473116619240)
---

# 前言
像许多视频游戏爱好者一样,我也到了那个无法抗拒本性、让 Codex 为我制作一款游戏的时刻。
我在 Codex 为我制作的动画方面遇到了一些问题,以下是我解决这些问题的方法。
如果你只是为了流程而来,请随时跳过下一节。如果你对旅程感兴趣,而不仅仅是目的地,请继续阅读!
## 旅程
早在 AI 出现之前,我就涉足过游戏开发。像大多数人一样,我最终定居于 Unity,并花了几年时间使用它。我有许多完全不同游戏的点子,从点击式冒险游戏到合作故事驱动的 RPG。
我试过独自构建,也试过与朋友一起构建。我的个人时间限制是一个制约因素,但不足以阻碍我编写大量游戏系统代码。对我来说最大的问题是图形。
虽然我是伴随着 90 年代的游戏长大的,但我从来不是像素艺术的粉丝,并且总是希望我的游戏有一种风格化的外观。它们不必处于图形技术的最前沿。但它们必须有个性。
我研究过雇佣艺术家,但即使是一张概念艺术作品,也会花掉我当时钱包里太多的钱。我研究过自己制作图形。画画从来都不是我的强项,尽管后来发现我在 Blender 中可以雕刻得相当不错。仅用了 150 小时我就拥有了一个角色!
一个角色,结果发现我没有机会在电子游戏中使用它。一个角色,结果发现即使我解决了网格问题,制作动画也极其困难。长话短说,又一个项目被放弃了。
快进到今天,Codex 一次性完成了我用一段话描述的游戏。现在,我知道你在想什么:他在胡说八道,没有什么能一蹴而就,尤其是游戏。你只说对了一部分。
这个游戏有由形状组成的基础图形,玩起来不是很有趣,但它能运行!
主角可以跑、跳、攻击,并且有魔法攻击。敌人冲向核心,停下来攻击玩家或 NPC 防御者。有生命值、法力值、资源池、失败条件,甚至有失败动画!我们在游戏中认为理所当然的所有事情,都通过一个提示词为我完成了!
简直天堂!我要做的就是创建几个 Sprite 表来替换那些棍棒和石头图形。没什么大不了的!
呃,是的,这是个大事!这没那么容易。
如果你读到这里,你可能知道我在哪里遇到了问题。图像模型无法遵循严格的规则。为什么这很重要?因为 Sprite 表必须按照数学顺序排列,以便游戏引擎可以通过编程访问每一帧。换句话说,它必须被分割成完美的帧,并且角色必须始终位于帧的中心。最后一点很重要,否则在播放动画时角色会抖动。
最重要的是,背景必须是透明的,而且并非所有模型都能处理这个问题!
我花了 2 天时间,尝试了几十种提示词变体、参考网格变体,但没有任何效果!我准备放弃了……阻止我放弃的一件事是,我为这个特定任务尝试过的 AI 封装工具并不总是听从我在动画中的要求。即使在他们自己的 AI 助手清理了我的提示词后,也会出现一些超级奇怪的结果。
值得庆幸的是,这两个问题(取景和背景透明度)很久以前就已经通过编程方式解决了。一旦我找到了那条路,没过多久,在 AI 的帮助和指导下,我就拥有了一些脚本,它们接收来自图像模型的不合格产品,并生成具有清晰边缘和透明背景的可靠 Sprite 表。
好耶!胜利了!
不。又庆祝早了。
那些尝试过使用图像模型创建 Sprite 表帧的人,可能知道这会导致什么。那些模型不理解走路。或者跑步。它们不知道腿是怎么工作的!你可以确切地告诉它们每条腿应该在哪里,脚应该怎么转,它们仍然会搞砸。即使在像素图形中也是如此!我认为唯一多少能幸免的风格是俯视角,因为脚的位置只有 2 种变化。感谢 AI 科学的奇迹!
就这样,死胡同了。我运行的提示词多到都数不清了。我制作了 10x5 的 Sprite 表,并尝试选择看起来像是一个不错进展的帧。没有任何效果很好。有些尝试很接近,但这并不是一个我愿意为了次优结果而多次使用的流程。我也不会向任何人推荐它。
X 上的一篇帖子救了我。这是对有类似问题的人的一个简短回复。“use kling and just extract frames”(我是意译,我是在 2 周前看到的,找不到作者或帖子了)
什么?!我最初忽略了它。听起来作者建议我用大炮打蚊子(杀鸡用牛刀)。但随后我调查了一下。这是一个可行的解决方案!视频模型没有同样的腿部问题!事实上,它们在任何动作上都没有问题。而且帧提取问题很久以前就解决了,我甚至不需要寻找工具,它就自动出现在我面前!此外,我已经完成了剩余 99% 的流程。我只需要添加一个用于将多个文件中的帧拼接在一起的脚本,Codex 在几分钟内就写好了!
在提示视频模型时,有几件事需要考虑,以确保生成的视频是可行的,但这不难弄清楚,我会在下面给出提示。
呼!胜利!
我对这个流程的工作方式非常满意。我甚至尝试将一些动画拼接在一起,效果很好;尽管在帧验证方面需要一些调整。但是一旦将此工作流连接到项目中,Codex 的表现就非常出色。
闲话少叙,希望你享受下面的工作流程!
## 流程
这是工作流程的技术版本。这主要是由 AI 编写的,其中穿插了我的文字,以提供提示和评论。我建议你至少阅读前 2 步,以了解如何提示图像和视频模型以获得最佳结果。我从几十次迭代中整理了这些指南,你可以将它们转储到你的代理中,让它将你的简单提示词转换为适合模型的提示词。第 3 步及以后是为你的编码代理准备的。我通过多次干净的运行测试并完善了它们。复制、粘贴,告诉你的代理按照描述构建脚本,并在你的视频上运行工作流程!
底部有一个提示和技巧部分。它是为你,读者准备的。请务必阅读这些,因为最后有一个省钱技巧!
祝你好运,玩得开心!
1. 创建第一个适合动画的姿势
使用图像模型(如 GPT Image 2 或 Nano Banana 2)创建一张全身角色图像。该图像将成为视频模型的第一帧。
使用精确的色度绿:
- Hex: #00FF00
- RGB: 0,255,0
背景必须完全平坦。没有阴影、地板、渐变、道具、光照衰减或背景物体。角色设计不能在任何地方使用这种绿色,包括衣服、宝石、魔法、轮廓、抗锯齿或发光。
为动画而不是肖像框定角色:
- 从头到脚可见全身
- 可见完整的武器、披风、头发、松散的布料和配饰
- 没有裁剪
- 角色在帧中居中
- 四周留有充足的空白边距
- 角色的任何部分都不要进入外部的 20-30% 边界区域
- 对于待机/游戏动画,角色高度通常应约为画布的 40-50%
这很重要,因为视频模型制作的动画通常比第一个姿势暗示的范围更宽。如果武器、披风、手、脚、头发或效果开始时靠近边缘,Kling 可能会在运动开始时将其推出画面。
对于待机以外的任何动画,在进入视频之前,我通常会使用图像模型创建一个过渡姿势。给图像模型基本角色参考,然后要求新动画的第一帧作为偏离待机状态的小幅过渡。不要先要求最极端的姿势。这有助于攻击、奔跑、跳跃、施法、受击和落地自然流畅,而不是突然跳入一个不连贯的姿势。
对于非常简单的像素 Sprite,这个过渡姿势可能是最重要的控制步骤。例如,对于微小的经典 RPG 行走循环,首先创建一个行走姿势图像:一只脚移动几个像素,另一只脚向后移动,膝盖轻微弯曲,微小的武器/盾牌手臂摆动,相同的视图,相同的比例,相同的背景。然后使用该图像作为 Kling 的第一帧,并配以简短的提示词。简单的图画通常需要更少的提示词工程,而不是更多。
图像提示词应指定:
- 仅一个角色
- 全身 2D 游戏角色
- 精确的起始姿势
- 相机/视图角度
- 角色在帧中居中
- 动画安全边距
- 完整的武器/效果可见
- 清晰可读的剪影
- 设计稳定,四肢清晰分离
- 仅限平坦的 #00FF00 背景
- 没有文本、水印、边框、阴影、地板、道具、渐变或额外效果
生成后,验证背景实际上是精确的 #00FF00。如果模型创建了柔和的绿色渐变或接近绿色的像素,请在将图像用于动画之前,将边界连接的背景展平为精确的 #00FF00。拒绝或修复任何具有裁剪肢体、裁剪武器、肖像框架、阴影、角色上有绿色、额外道具、额外角色或重要像素靠近边缘的图像。
2. 在 Kling 中制作该姿势的动画
使用图像模型的结果作为 Kling 的第一帧。输出是 Sprite 流程的受控源素材,而不是电影级视频。
Kling 通常给你一个提示词字段,所以将动作、保留规则、相机规则、背景规则和避免约束放入一个复制粘贴的提示词中。不要依赖单独的负面提示词,除非你的工具实际上提供了一个。
根据资源调整提示词。对于简单的图画和微小的像素 Sprite,首先制作一个过渡姿势图像,然后使用简短的字面 Kling 提示词。长的方向锁定提示词可能会给 Kling 更多的重新解释空间,导致移动、旋转或重新设计。
对于简单的经典 RPG 像素 Sprite,避免使用诸如 top-down 3/4 或 isometric 之类的短语,除非第一帧真正是斜向的。这些短语可能会使 Kling 旋转角色或向不同方向行走。更倾向于这样的措辞:
```
Use the uploaded image as the exact first frame.
Animate a tiny retro RPG sprite marching in place.
Keep the character pinned to the center of the screen.
Keep the same front-facing view for the entire clip.
The character must not turn, rotate, face diagonally, face sideways,
move forward, move backward, or move across the screen.
Only animate a simple two-step pose cycle:
the feet alternate a few pixels, the knees bend slightly,
and the weapon arm and off-hand/shield arm bob slightly.
Keep the head, chest, body angle, equipment sides, size, colors,
and pixel-art design the same.
Locked camera.
Flat #00FF00 green background stays unchanged.
No shadows, no floor, no effects, no blur, no new details, no redesign.
```
对于更复杂的动画,Kling 提示词可以更机械。仅包含改变像素的约束:
- Use the uploaded image as the exact first frame
- Preserve character design, outfit, proportions, weapons, face, and 2D art style
- Describe the visible action in plain body-motion language
- Locked camera
- No zoom, pan, rotation, cuts, shake, dolly, or depth movement
- Character stays centered and the same size on screen
- Full body, weapons, and effects stay inside the frame
- Fixed facing direction with no yaw into neighboring directions
- Flat #00FF00 background with no floor, shadows, gradients, lighting changes, props, text, watermark, or motion blur
不要模糊地描述动作。
坏:
```
fast overhead sword slash
```
好:
```
Use the uploaded image as the exact first frame.
Create an overhead sword attack.
The character makes a small weight shift,
raises the sword overhead,
pauses briefly in anticipation,
steps forward slightly,
strikes downward,
follows through,
then returns toward the ready stance.
Keep the camera locked,
the character centered,
the full body and sword inside the frame,
and the flat #00FF00 background unchanged.
```
对于等距行走,注意不要暗示深度移动。使用原地行走,说明角色面向该方向,并明确禁止推拉移动或尺寸变化。对于正南/下行走,如果 Kling 开始漂移,禁止偏航到东南或西南。
对于跳跃、下落和着陆等垂直动画,首先干净地生成身体运动。添加着陆尘土、起飞风或其他垂直效果作为单独的叠加动画。脚部效果可能会导致 Kling 在帧内向上或向下漂移角色。
小心使用同一图像作为第一帧和最后一帧。有时模型将其解释为“保持此图像”并创建静止视频。如果需要,跳过最后一帧输入,然后从生成的素材中选择一个好的结束帧。
如果动作很好但结尾没有连接回待机或下一个动画,不要自动重新运行整个视频。向图像模型索要一个或几个桥接帧。图像迭代通常比另一次视频生成更便宜、更快速。
> 代理交接
> 从现在开始,步骤是为你的编码代理准备的。你可以将以下说明复制/粘贴到你的项目中,并要求代理构建本地脚本,然后在你于步骤 1 和 2 中创建的视频上运行流程。本地工作流程部分没有秘密或付费 API,只有文件、Python 脚本、FFmpeg 和 Pillow。
3. 从视频中提取全分辨率帧
将此脚本创建为 tools/extract_frames_ffmpeg.py。
如果你将此部分提供给编码代理,请它围绕 ffmpeg 和 ffprobe(来自 FFmpeg 项目的系统命令行工具;ffprobe 随 FFmpeg 一起提供;通过 Homebrew/apt/winget 或从 ffmpeg.org/download.html 安装,而不是 pip/npm)创建一个确定性的本地 Python CLI 包装器。没有 API,没有秘密,没有托管服务。该脚本的工作是将一个视频变成一个编号的全分辨率 PNG 帧文件夹和一份 JSON 报告。
使用你喜欢的任何文件夹结构。在下面的示例中,占位符意味着:
- <source-video>: 你从视频模型下载的动画视频
- <run-dir>: 此动画的临时工作文件夹,例如 work/runs/2026-04-28_mage_attack_01
- <character>: 你的角色名称,例如 mage
- <animation>: 你的动画名称,例如 attack_01
- <frame-count>: 通常是 12 或 24
实现契约:
- script path: tools/extract_frames_ffmpeg.py
- dependencies: Python 标准库加上系统 ffmpeg 和 ffprobe
- input: 一个视频文件
- output: 一个有序 PNG 帧目录
- default behavior: 按播放顺序提取每个解码的源帧
- optional behavior: 提供 --fps 时的恒定 FPS 采样
- optional behavior: 提供 --crop 时的 FFmpeg 裁剪表达式
- output naming: frame_0001.png, frame_0002.png 等
- report path: <output-dir>/extraction_report.json
必需的 CLI:
```
python tools/extract_frames_ffmpeg.py \
--input "<source-video>" \
--output-dir "<run-dir>/extracted/<character>/<animation>" \
--overwrite
```
推荐的参数:
- --input: 源视频路径
- --output-dir: 全分辨率 PNG 的目标文件夹
- --fps: 可选输出 FPS,默认省略
- --cro