# How to Build an Agent Platform
**作者**: Ashpreet Bedi
**日期**: 2026-05-07T15:43:19.000Z
**来源**: [https://x.com/ashpreetbedi/status/2052413981487427871](https://x.com/ashpreetbedi/status/2052413981487427871)
---
Cloud platforms, data platforms, and now agent platforms.
Every company wants to build one and run a fleet of agents. Having built cloud, compute and data platforms before, I'm hoping we can learn from the mistakes of our past and build it right the first time 'round.
The data era is a particularly cautionary tale. I lived through the great unbundling where we had to stitch multiple tools for ingestion, orchestration, transformation, and services for metadata, BI, and data quality. Each tool worked great in isolation but using them together was a pain. 80% of engineering time went into gluing things together. Then came the bundling. Snowflake, Databricks, and the cloud providers (esp AWS) consolidated the stack and provided unified platforms.
The agent era is starting the same way, with features being sold as products and vendors for solving problems that don't really exist yet.
If you find yourself running agents with data on 3 providers, traces in multiple places and no auto-improvement loop, this article is for you.
## You need an agent platform
If you think of agents as apps, it becomes clear that they need a system to run on, like an OS.
Your agent platform is responsible for running the agents, collecting data and metrics, managing security by preventing unauthorized access, and stopping one agent from accessing or polluting the data of another.
## What we're building
Today we'll build an agent platform that you can run locally, or on Railway for $20/mo.
Once it's running, you should be able to ship a new agent (or workflow) without writing any code. Because the platform takes care of everything, claude code can build new agents with a high degree of quality, and then recursively improve them by querying them live. This is the single biggest advantage of having a unified agent platform.
We'll also set up a scheduler for recurring work, lock in behavior with evals, and connect agents to interfaces like Slack.
The most fun is watching claude code recursively improve your agents.
## What makes an agent platform
An agent platform is made of five parts:
1. Runtime: the service that runs the agents. This part does most of the heavy lifting.
2. Storage: the database where our data lives: agent sessions, memory, knowledge, traces and eval history.
3. Connectors: tools for agents to connect with external systems via MCP, API, or CLI. Having them in one place is a big + for security.
4. Interfaces: Slack, Discord, Telegram, custom UIs. One place to resolve identity across surfaces, so the same person is the same user_id whether they ping you in Slack or hit the web app.
5. Infrastructure: where everything runs. We'll use Docker for local and Railway for production.
## Let's get started
I'm going to share a foundational codebase that you can build upon.
This, in my opinion, is the perfect starting point for an agent platform.
```
agent-platform
├── agents # agent code goes here
│ ├── code_search.py
│ └── web_search.py
├── app # server code goes here
│ ├── config.yaml
│ ├── main.py
│ └── settings.py
├── compose.yaml
├── db
│ ├── session.py
│ └── url.py
├── Dockerfile
├── docs # docs go here
│ ├── create-new-agent.md
│ ├── eval-and-improve.md
│ ├── improve-agent.md
│ └── review-and-improve.md
├── evals
│ └── cases.py # test cases
└── README.md
```
## Step 1: Run locally
First let's clone, configure, and run our agent platform.
Make sure Docker is installed and running. Follow these steps if not.
Then open your terminal and run one by one:
1. Clone the agent-platform template
```
git clone https://github.com/agno-agi/agentos-railway-template.git agent-platform
cd agent-platform
```
2. Configure your environment. Copy the example .env file, open in your favorite code editor and add the OpenAI key there.
```
cp example.env .env
```
3. Run your platform: 1 FastAPI server and 1 Postgres database
```
docker compose up -d --build
```
This brings up two containers: a FastAPI server and a Postgres database. Confirm the API is running at http://localhost:8000/docs.
Now let's give our platform a UI.
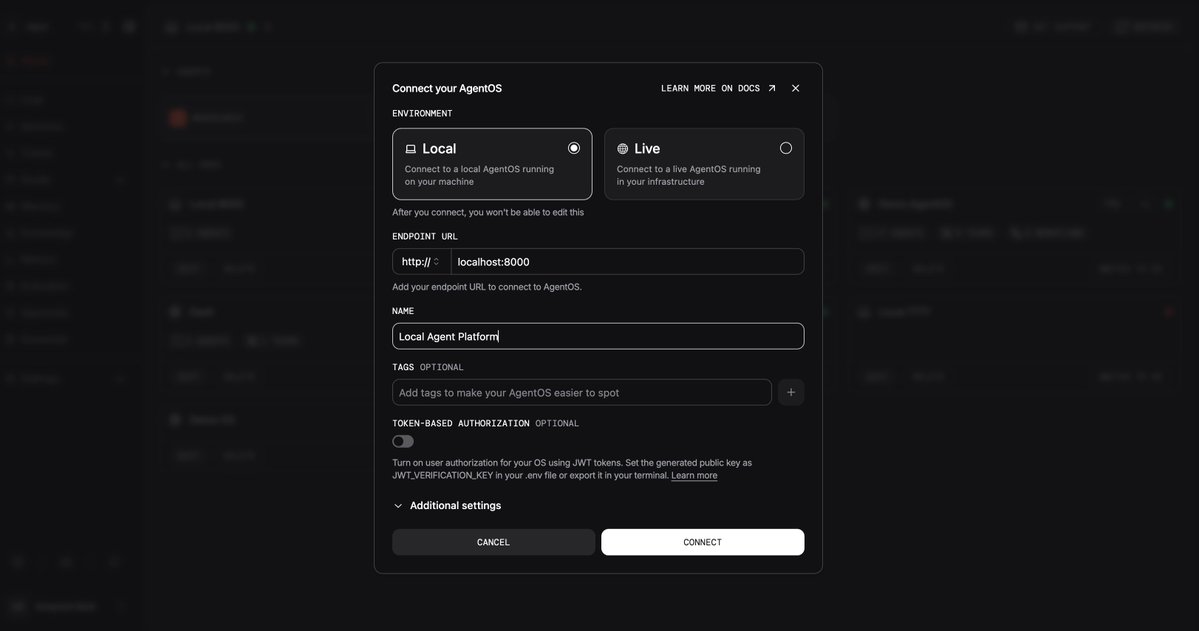
1. Head to os.agno.com and sign in.
2. Connect to your local OS at http://localhost:8000.
You should see something like:
## Step 2: Create your first agent
The codebase comes with two reference agents and a Claude Code prompt that can build new ones for you.
To create a new agent, open Claude Code and run
```
Run docs/create-new-agent.md
```
Claude will ask you what the agent should do, what tools it needs, then generate the agent file, register it in app/main.py, restart the container, and run a smoke test.

This usually takes 5-10 minutes for a simple agent. More if you're building something bespoke with custom tools.
## Step 3: Test your new agent
Open os.agno.com to chat with your agent. Run it through realistic prompts. Check the traces and sessions. Try to break it. Try out-of-distribution questions, prompt injections, edge cases. This usually takes 5-20 minutes.

## Step 4: Recursively improve your agent
This is where your platform starts paying dividends.
Open Claude Code in the repo and paste:
```
Run docs/improve-agent.md
```
Claude Code can directly hit your live agents using curl. Then iterate and improve your agents.
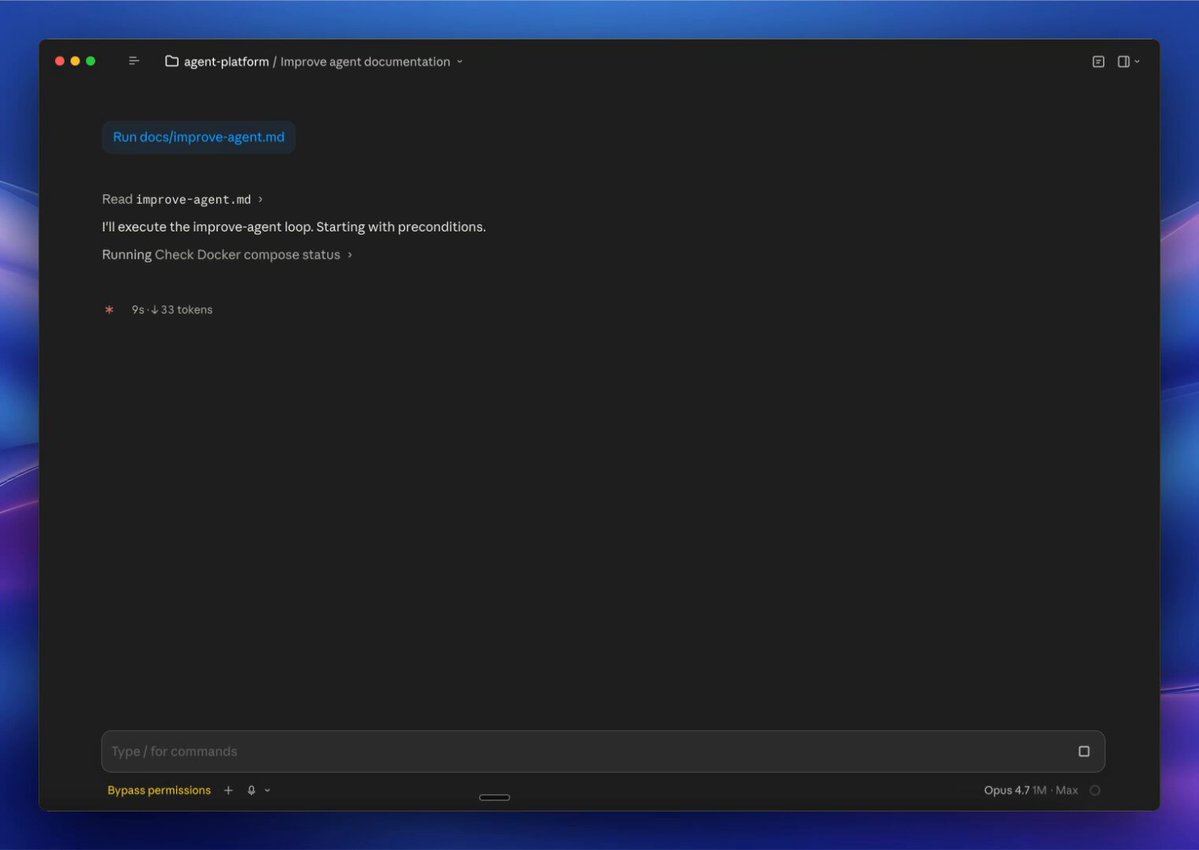
This is why owning the stack pays off. The trace data, the agent code, the running platform, and the iteration tool all live in one box. Claude Code can see all of it and improve as needed.
## Step 5: Lock in behavior with evals
Evals are the regression test for your agents. Same prompts, same agents, run on a schedule, fail when behavior drifts.
Evals are defined as a set of cases:
```
# evals/cases.py
Case(
name="web_search_recent_anthropic_research",
agent=web_search,
input="What did Anthropic publish about agent research recently?",
criteria=(
"Answers the question by citing at least one real Anthropic URL "
"(anthropic.com domain). The response is grounded in fetched content "
"rather than refusing to answer."
),
expected_tool_calls=(_WEB_SEARCH_TOOL,),
)
```
Run them later with: python -m evals
Results write to your Postgres via eval_db, so eval history shows up at os.agno.com alongside sessions and traces.
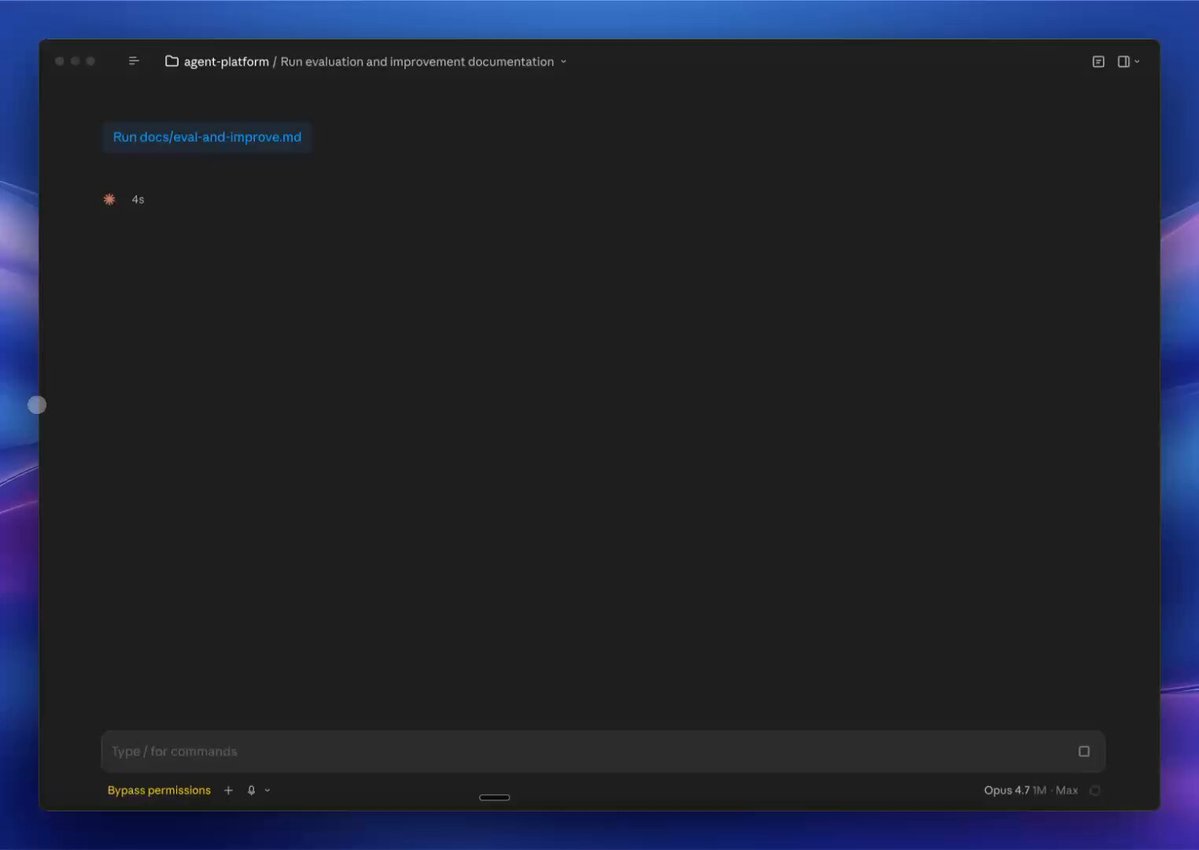
Connect Claude Code to the diagnosis loop by pasting Run docs/eval-and-improve.md. It triages every failure and fixes the issues in scope.
## Step 6: Run on Railway
Let's take our platform live by hosting it somewhere. Your company probably has a set way of running software. Follow whatever that is.
If you're looking for a place to test this out without going through the full devops process, Railway is the cheapest and fastest PaaS I've found. $20/month gets you pretty far and the codebase already comes with deploy-to-railway scripts.
> Requires the Railway CLI and railway login.
6.1 Configure production environment
The deploy scripts read .env.production first and fall back to .env. This lets you keep separate values for local and production: different OpenAI keys with different budgets, production-only credentials, a different Slack workspace, and so on.
```
cp .env .env.production
# Edit .env.production with production values
```
6.2 Deploy
The codebase comes with a script that provisions a Postgres database and deploys the app on the same private network. Run it:
```
./scripts/railway/up.sh
```
6.3 Your first deploy will fail. That's expected.
Token-Based Authorization is ON by default.
Without a JWT_VERIFICATION_KEY, the app refuses to serve traffic. Your platform's job is to keep your data off the public web. The fix is to generate a key and put it in your production env.
> The alternative was to ship with auth off and expect people to add it on later, which we all know isn't going to happen. People will leave their servers open to the public internet, get hacked, then blame me.
Token-Based Auth gives you three things:
- No public access. The server rejects requests without a valid token.
- Per-request identity. The middleware parses the token and injects user_id, session_id, and custom claims into your endpoints. Each request is tied to a user and session, so data leakage is prevented.
- Granular permissions. A user-level token can run an agent and view its own sessions. An admin token can read everyone's sessions and test any agent. You don't need to know or care about RBAC right now, but you have the foundation in place for when you start thinking about security.
6.4 Get your verification key
The default path is to let os.agno.com generate the key pair for you:
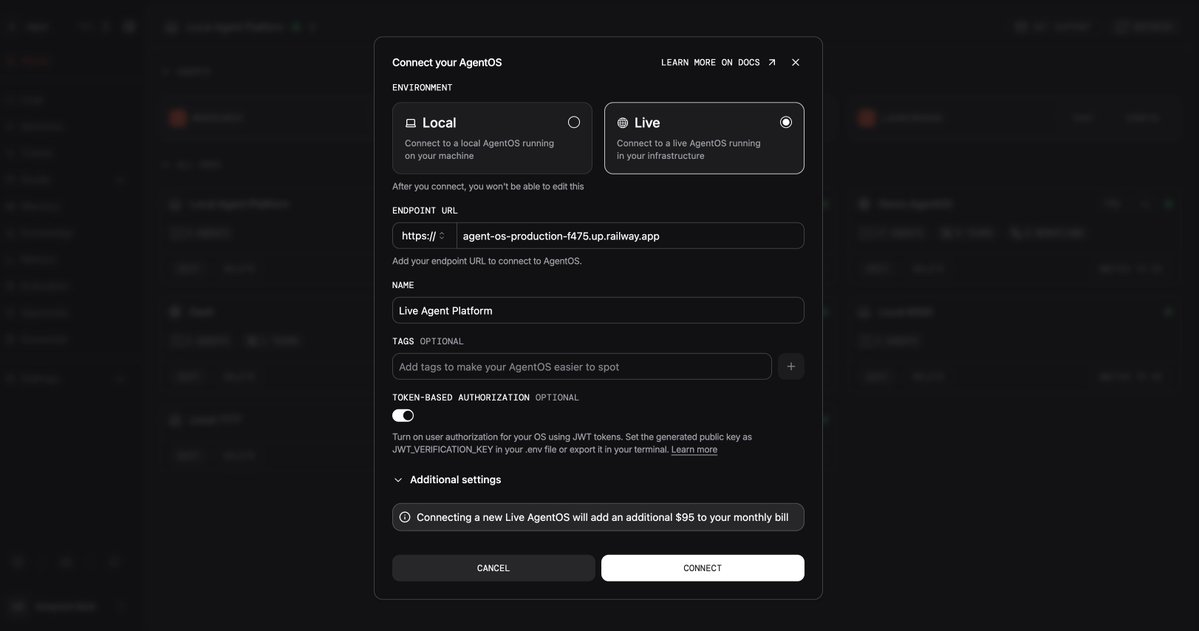
1. Open os.agno.com, click Add OS → Live, enter your Railway domain
2. Enable Token Based Authorization and then connect.
3. Paste the public key into .env.production.
```
JWT_VERIFICATION_KEY=-----BEGIN PUBLIC KEY-----
MIIBIjANBgkq...
-----END PUBLIC KEY-----
```
> Live connections to AgentOS require a pro subscription. Use the PLATFORM30 coupon code for a 1 month free trial. Remember to cancel before the trial ends if you don't want to be charged.
FYI: You don't have to use os.agno.com for this. You can generate your own RSA or EC keypair, sign tokens with the private key in your own service, and put the matching public key in JWT_VERIFICATION_KEY. The platform doesn't care where the key came from, as long as incoming tokens verify.
6.5 Sync env and verify
While .env.production is open, point the in-cluster scheduler at your public Railway domain so cron triggers can reach AgentOS:
```
# .env.production
AGENTOS_URL=https://<your-app>.up.railway.app
```
Then push variables to Railway:
```
./scripts/railway/env-sync.sh
```
Railway auto-deploys when env values change. Watch the logs and confirm the platform is serving:
```
railway logs --service agent-os
```
Once you see successful requests, AgentOS will connect through your Railway domain and you're live.
6.6 Auto-deploys from GitHub
So far every code update needs ./scripts/railway/redeploy.sh.
To auto-deploy on push to main:
1. Open the Railway dashboard → your project → the agent-os service → Settings.
2. Under Source, click Connect Repo and pick your repo.
3. Set the deploy branch to main.
Every push to main now triggers a build and rolling deploy. ./scripts/railway/env-sync.sh is still how you sync env changes.
Opting out of JWT (not recommended)
If you must run production without auth (e.g., inside a private VPC behind another auth layer), set authorization=False in app/main.py and redeploy. Keep authorization on for any deploy holding real data. Without it, anyone who guesses your Railway domain can read your sessions and your agents.
Scaling
The default deploy is two replicas at 4Gi memory and 2 vCPU each. Gives you zero-downtime rolling deploys and basic fault tolerance. Bump numReplicas and limits up or down in railway.json as your usage grows.
## Going beyond agents
Rule of thumb: agents for open questions, teams for routing, workflows for processes. Most of your platform will be agents. A few will be teams or workflows. You'll know when you need each.
Multi-agent teams. When one agent isn't enough, route work across a team of specialists. Agno teams come in three modes:
- Coordinate. A leader plans the work, calls the right specialists, and synthesizes.
- Route. A router picks one specialist to handle the request.
- Broadcast. Every specialist runs in parallel; you aggregate.
Use teams when the right specialist isn't known up front. The teams overview walks through each mode.
Agentic workflows. When a process needs to run the same way every time, write a workflow. Workflows give you determinism. Use them for the few high-leverage flows in your platform that need to be repeatable. The workflows overview covers the patterns.
For more on agents themselves (instructions, tools, memory, model configuration), the agents overview is the reference.
## Scheduled tasks
The platform ships with a lightweight scheduler enabled by default in app/main.py:
```
agent_os = AgentOS(
name="AgentOS",
scheduler=True,
...
)
```
Schedule any agent or workflow on a cron. Common patterns:
- Maintenance. Purge sessions older than 90 days. Vacuum your Postgres tables. Rotate trace data into cold storage.
- Proactive runs. Every weekday morning, run an agent that summarizes overnight news for your portfolio companies. Post to Slack.
- Catch regressions. Schedule python -m evals weekly against your production agents. Drift shows up in eval history before users feel it.
See the agno scheduler docs for the cron API.
## Connect to interfaces
Your agents should be available where your users are. Slack threads. Discord channels. Telegram for the field team.
Or most importantly: a custom UI inside your product.
For slack, discord, telegram: the pattern is similar. Expose the agents via an interface. See app/main.py for a reference:
```
interfaces: list = []
if SLACK_BOT_TOKEN and SLACK_SIGNING_SECRET:
from agno.os.interfaces.slack import Slack
interfaces.append(
Slack(
agent=code_search,
streaming=True,
token=SLACK_BOT_TOKEN,
signing_secret=SLACK_SIGNING_SECRET,
resolve_user_identity=True,
)
)
...
agent_os = AgentOS(
...
interfaces=interfaces,
)
```
Read the interfaces guide for more information.
## Wrapping up
Congratulations. If you made it this far, you have a unified agent platform running securely in your cloud. Technical users can create and deploy agents using Claude Code. Non-technical users can use the no-code UI.
Sessions, traces, and knowledge live in your database. Your infrastructure is gated behind JWT-based RBAC and API keys are managed in one place.
## Why it's important to control your data
Before we close, a note on data sovereignty.
Every interaction with your platform produces data. Sessions, memory, and traces all flow into your Postgres database. Two reasons why this matters:
1. Compliance. Keeping the data in your own database reduces the risk of a breach. The moment customer data, proprietary code, or internal documents touch a third-party trace tool or memory service, your level of security is whatever their level of security is.
2. Auto Improvement. Your traces are how Claude Code (or you) close the loop on agent quality. Coding agents are going to be the main way to build and improve agents. They can only work because the trace data lives where the iteration tool can read it. Vendor-stitched stacks split this surface across three SaaS products and the loop never closes.
The agents you ship today are the smallest part of what you've built. The platform underneath them, and the iteration loop it enables, is the thing that matters.
Thanks for reading. Built with 🧡 using Agno.
## 相关链接
- [Ashpreet Bedi](https://x.com/ashpreetbedi)
- [@ashpreetbedi](https://x.com/ashpreetbedi)
- [33K](https://x.com/ashpreetbedi/status/2052413981487427871/analytics)
- [Follow these steps](https://www.docker.com/get-started/)
- [http://localhost:8000/docs](http://localhost:8000/docs)
- [os.agno.com](https://os.agno.com/)
- [os.agno.com](https://os.agno.com/)
- [os.agno.com](https://os.agno.com/)
- [Railway CLI](https://docs.railway.com/cli#installing-the-cli)
- [os.agno.com](https://os.agno.com/)
- [os.agno.com](https://os.agno.com/)
- [os.agno.com](https://os.agno.com/)
- [teams overview](https://docs.agno.com/teams/overview)
- [workflows overview](https://docs.agno.com/workflows/overview)
- [agents overview](https://docs.agno.com/agents/overview)
- [agno scheduler docs](https://docs.agno.com/agent-os/scheduler)
- [interfaces guide](https://docs.agno.com/agent-os/interfaces/overview)
- [Upgrade to Premium](https://x.com/i/premium_sign_up)
- [11:43 PM · May 7, 2026](https://x.com/ashpreetbedi/status/2052413981487427871)
- [33.4K Views](https://x.com/ashpreetbedi/status/2052413981487427871/analytics)
- [View quotes](https://x.com/ashpreetbedi/status/2052413981487427871/quotes)
---
*导出时间: 2026/5/8 13:31:50*
---
## 中文翻译
# 如何构建一个智能体平台
**作者**: Ashpreet Bedi
**日期**: 2026-05-07T15:43:19.000Z
**来源**: [https://x.com/ashpreetbedi/status/2052413981487427871](https://x.com/ashpreetbedi/status/2052413981487427871)
---

云平台、数据平台,以及现在的智能体(Agent)平台。
每家公司都想构建一个并运行一支智能体队伍。鉴于我之前构建过云、计算和数据平台的经验,我希望我们能从过去的错误中吸取教训,第一次就把平台做对。
数据时代是一个特别值得警惕的故事。我经历了“大解耦”时代,那时我们必须为了摄取、编排、转换以及元数据、BI 和数据质量服务而拼接多个工具。每个工具在单独使用时都很棒,但组合使用却很痛苦。80% 的工程时间都花在了“胶水代码”上。然后是“捆绑”时代。Snowflake、Databricks 和云服务商(特别是 AWS)整合了技术栈,提供了统一的平台。
智能体时代正以同样的方式开始,功能被当作产品出售,供应商试图解决那些尚未真正存在的问题。
如果你发现自己正在运行数据分散在 3 个提供商、追踪信息到处都是且没有自动改进循环的智能体,这篇文章就是为你准备的。
## 你需要一个智能体平台
如果你把智能体看作是应用程序,很明显它们需要一个运行系统,就像操作系统(OS)一样。
你的智能体平台负责运行智能体、收集数据和指标、通过防止未授权访问来管理安全性,并阻止一个智能体访问或污染另一个智能体的数据。
## 我们要构建什么
今天我们将构建一个智能体平台,你可以在本地运行,或者在 Railway 上以每月 20 美元的价格运行。
一旦它运行起来,你应该能够在无需编写任何代码的情况下发布一个新的智能体(或工作流)。因为平台处理了一切,Claude Code 可以构建高质量的智能体,然后通过实时查询它们来递归地改进它们。这是拥有统一智能体平台的最大的单一优势。
我们还将设置一个用于定期工作的调度器,通过评估来锁定行为,并将智能体连接到 Slack 等接口。
最有趣的是看着 Claude Code 递归地改进你的智能体。
## 什么构成了智能体平台
智能体平台由五个部分组成:
1. **运行时**:运行智能体的服务。这部分承担了大部分繁重的工作。
2. **存储**:我们的数据所在的数据库:智能体会话、记忆、知识、追踪记录和评估历史。
3. **连接器**:智能体通过 MCP、API 或 CLI 连接外部系统的工具。将它们集中在一个地方对安全性来说是一大加分项。
4. **接口**:Slack、Discord、Telegram、自定义 UI。在一个地方解析所有表面的身份,因此无论是在 Slack 中 ping 你还是访问 Web 应用,同一个人都是同一个 user_id。
5. **基础设施**:一切运行的地方。我们将使用 Docker 进行本地开发,使用 Railway 进行生产环境部署。
## 让我们开始吧
我将分享一个基础代码库,你可以在此基础上进行构建。
在我看来,这是智能体平台的完美起点。
```
agent-platform
├── agents # 智能体代码放在这里
│ ├── code_search.py
│ └── web_search.py
├── app # 服务器代码放在这里
│ ├── config.yaml
│ ├── main.py
│ └── settings.py
├── compose.yaml
├── db
│ ├── session.py
│ └── url.py
├── Dockerfile
├── docs # 文档放在这里
│ ├── create-new-agent.md
│ ├── eval-and-improve.md
│ ├── improve-agent.md
│ └── review-and-improve.md
├── evals
│ └── cases.py # 测试用例
└── README.md
```
## 第 1 步:在本地运行
首先让我们克隆、配置并运行我们的智能体平台。
确保 Docker 已安装并正在运行。如果没有,请按照以下步骤操作。
然后打开你的终端并逐一运行:
1. 克隆 agent-platform 模板
```
git clone https://github.com/agno-agi/agentos-railway-template.git agent-platform
cd agent-platform
```
2. 配置你的环境。复制示例 .env 文件,在你喜欢的代码编辑器中打开它,并在那里添加 OpenAI 密钥。
```
cp example.env .env
```
3. 运行你的平台:1 个 FastAPI 服务器和 1 个 Postgres 数据库
```
docker compose up -d --build
```
这将启动两个容器:一个 FastAPI 服务器和一个 Postgres 数据库。确认 API 正在 http://localhost:8000/docs 运行。
现在让我们给我们的平台一个 UI。
1. 访问 os.agno.com 并登录。
2. 连接到你在 http://localhost:8000 的本地 OS。
你应该会看到类似这样的内容:

## 第 2 步:创建你的第一个智能体
代码库附带两个参考智能体和一个 Claude Code 提示词,可以为你构建新的智能体。
要创建一个新的智能体,请打开 Claude Code 并运行
```
Run docs/create-new-agent.md
```
Claude 会询问你智能体应该做什么,它需要什么工具,然后生成智能体文件,在 app/main.py 中注册它,重启容器,并运行冒烟测试。

对于简单的智能体,这通常需要 5-10 分钟。如果你正在使用自定义工具构建定制的东西,则需要更多时间。
## 第 3 步:测试你的新智能体
打开 os.agno.com 与你的智能体聊天。通过真实的提示词运行它。检查追踪记录和会话。试着破坏它。尝试分布外的问题、提示词注入、边缘情况。这通常需要 5-20 分钟。

## 第 4 步:递归地改进你的智能体
这是你的平台开始产生回报的地方。
在代码库中打开 Claude Code 并粘贴:
```
Run docs/improve-agent.md
```
Claude Code 可以使用 curl 直接访问你的实时智能体。然后迭代并改进你的智能体。

这就是为什么拥有整个技术栈是值得的。追踪数据、智能体代码、运行平台和迭代工具都在一个地方。Claude Code 可以看到所有这些内容并根据需要进行改进。
## 第 5 步:通过评估锁定行为
评估是智能体的回归测试。相同的提示词,相同的智能体,按计划运行,当行为发生漂移时失败。
评估被定义为一组用例:
```
# evals/cases.py
Case(
name="web_search_recent_anthropic_research",
agent=web_search,
input="Anthropic 最近发布了关于智能体研究的什么内容?",
criteria=(
"通过引用至少一个真实的 Anthropic URL "
"(anthropic.com 域) 来回答问题。回答基于获取的内容,"
"而不是拒绝回答。"
),
expected_tool_calls=(_WEB_SEARCH_TOOL,),
)
```
稍后运行:python -m evals
结果通过 eval_db 写入你的 Postgres,因此评估历史与会话和追踪一起显示在 os.agno.com 上。
通过粘贴 `Run docs/eval-and-improve.md` 将 Claude Code 连接到诊断循环。它会对每个失败进行分类并修复范围内的问题。

## 第 6 步:在 Railway 上运行
让我们通过将平台托管在某个地方来使其上线。你的公司可能有一套既定的软件运行方式。遵循那套方式即可。
如果你正在寻找一个无需经历完整 devops 流程即可测试的地方,Railway 是我找到的最便宜、最快的 PaaS。每月 20 美元就能让你做很多事情,并且代码库已经附带了部署到 railway 的脚本。
> 需要安装 Railway CLI 并运行 `railway login`。
6.1 配置生产环境
部署脚本首先读取 `.env.production`,然后回退到 `.env`。这允许你为本地和生产环境保留不同的值:具有不同预算的不同 OpenAI 密钥、仅限生产的凭据、不同的 Slack 工作区等等。
```
cp .env .env.production
# 使用生产环境的值编辑 .env.production
```
6.2 部署
代码库附带一个脚本,用于配置 Postgres 数据库并在同一个私有网络上部署应用程序。运行它:
```
./scripts/railway/up.sh
```
6.3 你的第一次部署将会失败。这是意料之中的。
基于 Token 的授权默认开启。
没有 `JWT_VERIFICATION_KEY`,应用程序将拒绝提供服务。你的平台的工作是让你的数据远离公共网络。解决办法是生成一个密钥并将其放入你的生产环境变量中。
> 另一种选择是默认关闭授权并期望人们稍后添加它,我们都知道这不会发生。人们会将他们的服务器向公共互联网开放,被黑客攻击,然后责怪我。
基于 Token 的授权为你提供三样东西:
- **无公共访问**:服务器拒绝没有有效令牌的请求。
- **每个请求的身份**:中间件解析令牌并将 user_id、session_id 和自定义声明注入到你的端点中。每个请求都绑定到一个用户和会话,因此可以防止数据泄露。
- **细粒度权限**:用户级令牌可以运行智能体并查看其自己的会话。管理员令牌可以读取每个人的会话并测试任何智能体。你现在不需要了解或关心 RBAC,但是当你开始考虑安全性时,你已经有了基础。
6.4 获取你的验证密钥
默认方法是让 os.agno.com 为你生成密钥对:
1. 打开 os.agno.com,点击 Add OS → Live,输入你的 Railway 域名。
2. 启用基于 Token 的授权,然后连接。
3. 将公钥粘贴到 `.env.production` 中。

```
JWT_VERIFICATION_KEY=-----BEGIN PUBLIC KEY-----
MIIBIjANBgkq...
-----END PUBLIC KEY-----
```
> 到 AgentOS 的实时连接需要专业版订阅。使用 PLATFORM30 优惠代码享受 1 个月免费试用。如果你不想被扣费,请记得在试用结束前取消。
仅供参考:你不必为此使用 os.agno.com。你可以生成自己的 RSA 或 EC 密钥对,在你自己的服务中使用私钥对令牌进行签名,并将匹配的公钥放入 `JWT_VERIFICATION_KEY`。平台不关心密钥来自哪里,只要传入的令牌能通过验证即可。
6.5 同步环境变量并验证
当 `.env.production` 打开时,将集群内调度器指向你的公共 Railway 域名,以便 cron 触发器可以访问 AgentOS:
```
# .env.production
AGENTOS_URL=https://<your-app>.up.railway.app
```
然后将变量推送到 Railway:
```
./scripts/railway/env-sync.sh
```
当环境变量值发生变化时,Railway 会自动部署。观察日志并确认平台正在提供服务:
```
railway logs --service agent-os
```
一旦你看到成功的请求,AgentOS 将通过你的 Railway 域名连接,你就上线了。
6.6 从 GitHub 自动部署
到目前为止,每次代码更新都需要 `./scripts/railway/redeploy.sh`。
要在推送到 main 时自动部署:
1. 打开 Railway 仪表板 → 你的项目 → agent-os 服务 → Settings。
2. 在 Source 下,点击 Connect Repo 并选择你的仓库。
3. 将部署分支设置为 main。
现在每次推送到 main 都会触发构建和滚动部署。`./scripts/railway/env-sync.sh` 仍然是你同步环境变量更改的方式。
选择退出 JWT(不推荐)
如果你必须在没有授权的情况下运行生产环境(例如,在另一个授权层后面的私有 VPC 内部),请在 `app/main.py` 中设置 `authorization=False` 并重新部署。对于持有真实数据的任何部署,请保持授权开启。没有它,任何猜到你 Railway 域名的人都可以读取你的会话和智能体。
扩展
默认部署是两个副本,每个副本 4Gi 内存和 2 vCPU。这为你提供零停机滚动部署和基本容错能力。随着你的使用增长,在 `railway.json` 中向上或向下调整 `numReplicas` 和 `limits`。
## 超越智能体
经验法则:智能体用于开放式问题,团队用于路由,工作流用于流程。你的平台大部分将是智能体。少数将是团队或工作流。你会在需要时知道该使用哪一个。
多智能体团队。当一个智能体不够时,跨一组专家路由工作。Agno 团队有三种模式:
- **协调**:领导者规划工作,调用合适的专家,并进行综合。
- **路由**:路由器选择一个专家来处理请求。
- **广播**:每个专家并行运行;你进行聚合。
当预先不知道合适的专家时使用团队。团队概览将逐一介绍每种模式。
智能体工作流。当一个过程每次都需要以相同方式运行时,编写一个工作流。工作流提供确定性。将它们用于平台中少数需要可重复的高杠杆流程。工作流概览介绍了这些模式。
有关智能体本身的更多信息(指令、工具、记忆、模型配置),智能体概览是参考文档。
## 定时任务
平台附带一个轻量级调度器,在 `app/main.py` 中默认启用:
```
agent_os = AgentOS(
name="AgentOS",
scheduler=True,
...
)
```
使用 cron 定时安排任何智能体或工作流。常见模式:
- **维护**:清除超过 90 天的会话。清理你的 Postgres 表。将追踪数据轮转到冷存储。
- **主动运行**:每个工作日早晨,运行一个智能体,为你的投资组合公司总结隔夜新闻。发布到 Slack。
- **捕获回归**:每周针对你的生产智能体安排 `python -m evals`。在用户感觉到漂移之前,它就会出现在评估历史中。
有关 cron API,请参阅 agno 调度器文档。
## 连接到接口
你的智能体应该在用户所在的地方可用。Slack 线程。Discord 频道。用于现场团队的 Telegram。
或者最重要的是:你产品内的自定义 UI。
对于 slack、discord、telegram:模式是相似的。通过接口暴露智能体。参考 `app/main.py`:
```
interfaces: list = []
if SLACK_BOT_TOKEN and SLACK_SIGNING_SECRET:
from agno.os.interfaces.slack import Slack
interfaces.append(
Slack(
agent=code_search,
streaming=True,
token=SLACK_BOT_TOKEN,
signing_secret=SLACK_SIGNING_SECRET,
resolve_user_identity=True,
)
)
...
agent_os = AgentOS(
...
interfaces=interfaces,
)
```
阅读接口指南以获取更多信息。
## 总结
恭喜。如果你读到这里,你就有了一个统一的安全运行在你的云中的智能体平台。技术用户可以使用 Claude Code 创建和部署智能体。非技术用户可以使用无代码 UI。
会话、追踪记录和知识位于你的数据库中。你的基础设施受基于 JWT 的 RBAC 保护,API 密钥在一个地方管理。
## 控制数据的重要性
在结束之前,关于数据主权的一点说明。
与你的平台的每一次交互都会产生数据。会话、记忆和追踪记录都流入你的 Postgres 数据库。这很重要的原因有两个:
1. **合规性**:将数据保存在你自己的数据库中可以降低泄露风险。一旦客户数据、专有代码或内部文档触碰到第三方追踪工具或记忆服务,你的安全水平就变成了他们的安全水平。
2. **自动改进**:你的追踪记录是 Claude Code(或你)关闭智能体质量循环的方式。编码智能体将成为构建和改进智能体的主要方式。它们之所以能工作,是因为追踪数据与迭代工具可以读取的地方共存。供应商拼接的堆栈将这个表面分散在三个 SaaS 产品中,循环从未闭合。
你今天发布的智能体只是你构建内容的一小部分。它们下面的平台以及它启用的迭代循环才是关键。
感谢阅读。使用 Agno 构建并与 🧡 同行。